Drafts interface
The Drafts interface is where users can generate new drafts, review the tech packs for previous drafts, and download export files used in the garment-making process. In order to generate a draft, the user's account must have at least one Measurement Profile and one Pattern Library available.
Pattern libraries are resources that allow the creation of an infinite number of unique products (drafts) based on wide sets of modular pattern variants. In the examples on this page, Bespokify's bootstrap Female Shirt library will be used.
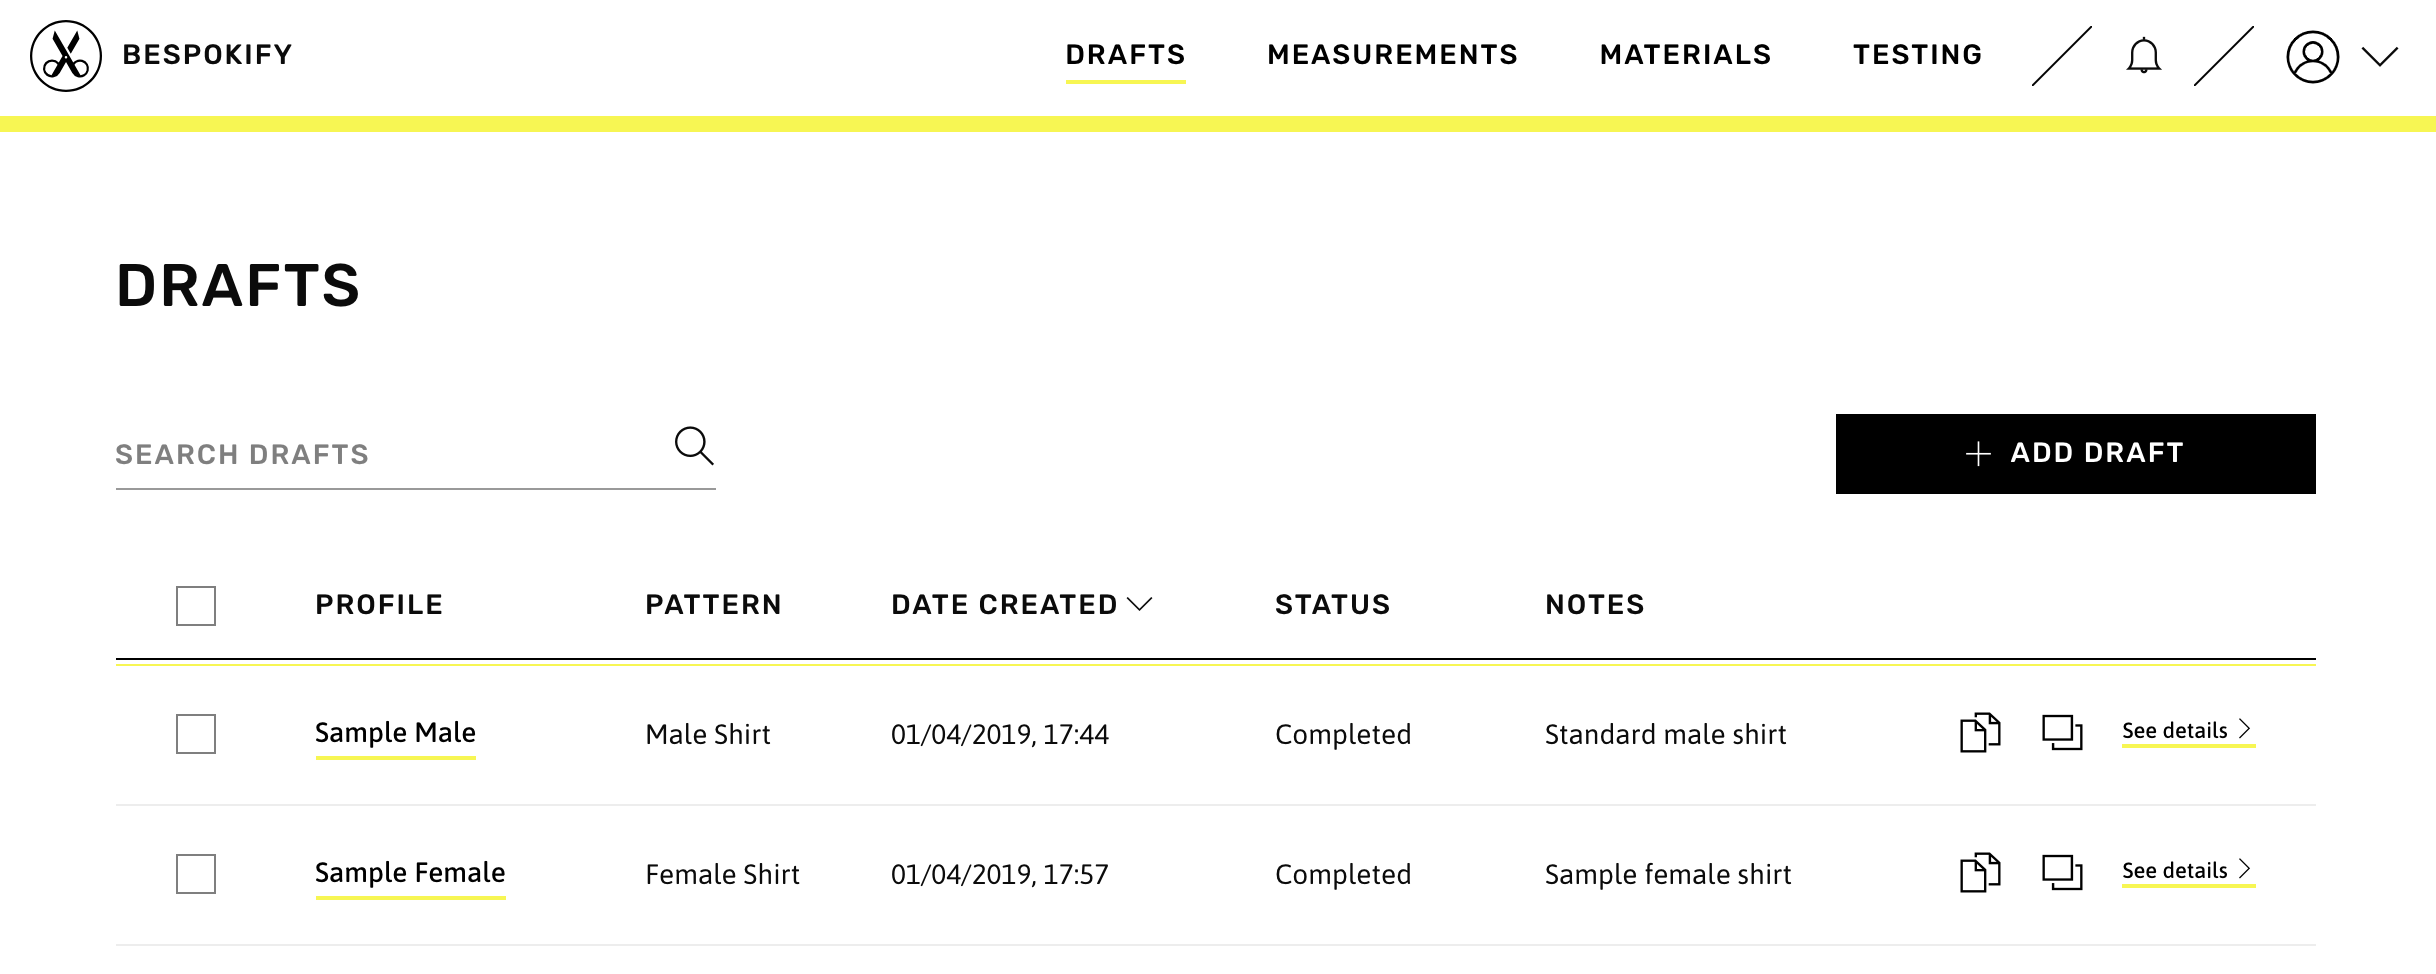
In the list view shown above, users have the possibility to search for drafts, add new ones, clone them, and view the details for their Tech Packs. It is also possible to view the Measurement Profile used to generate a draft by clicking on the Profile Name in the corresponding row. In this example, a Sample Male Shirt and Sample Female Shirt have already been generated.
Add a draft
To add a new draft, users must click the Add Draft button from the list view. The form consists of six sections: Select Profile, Select Pattern, Select Pattern Options, Select Materials, Select Seams, and the optional Notes.
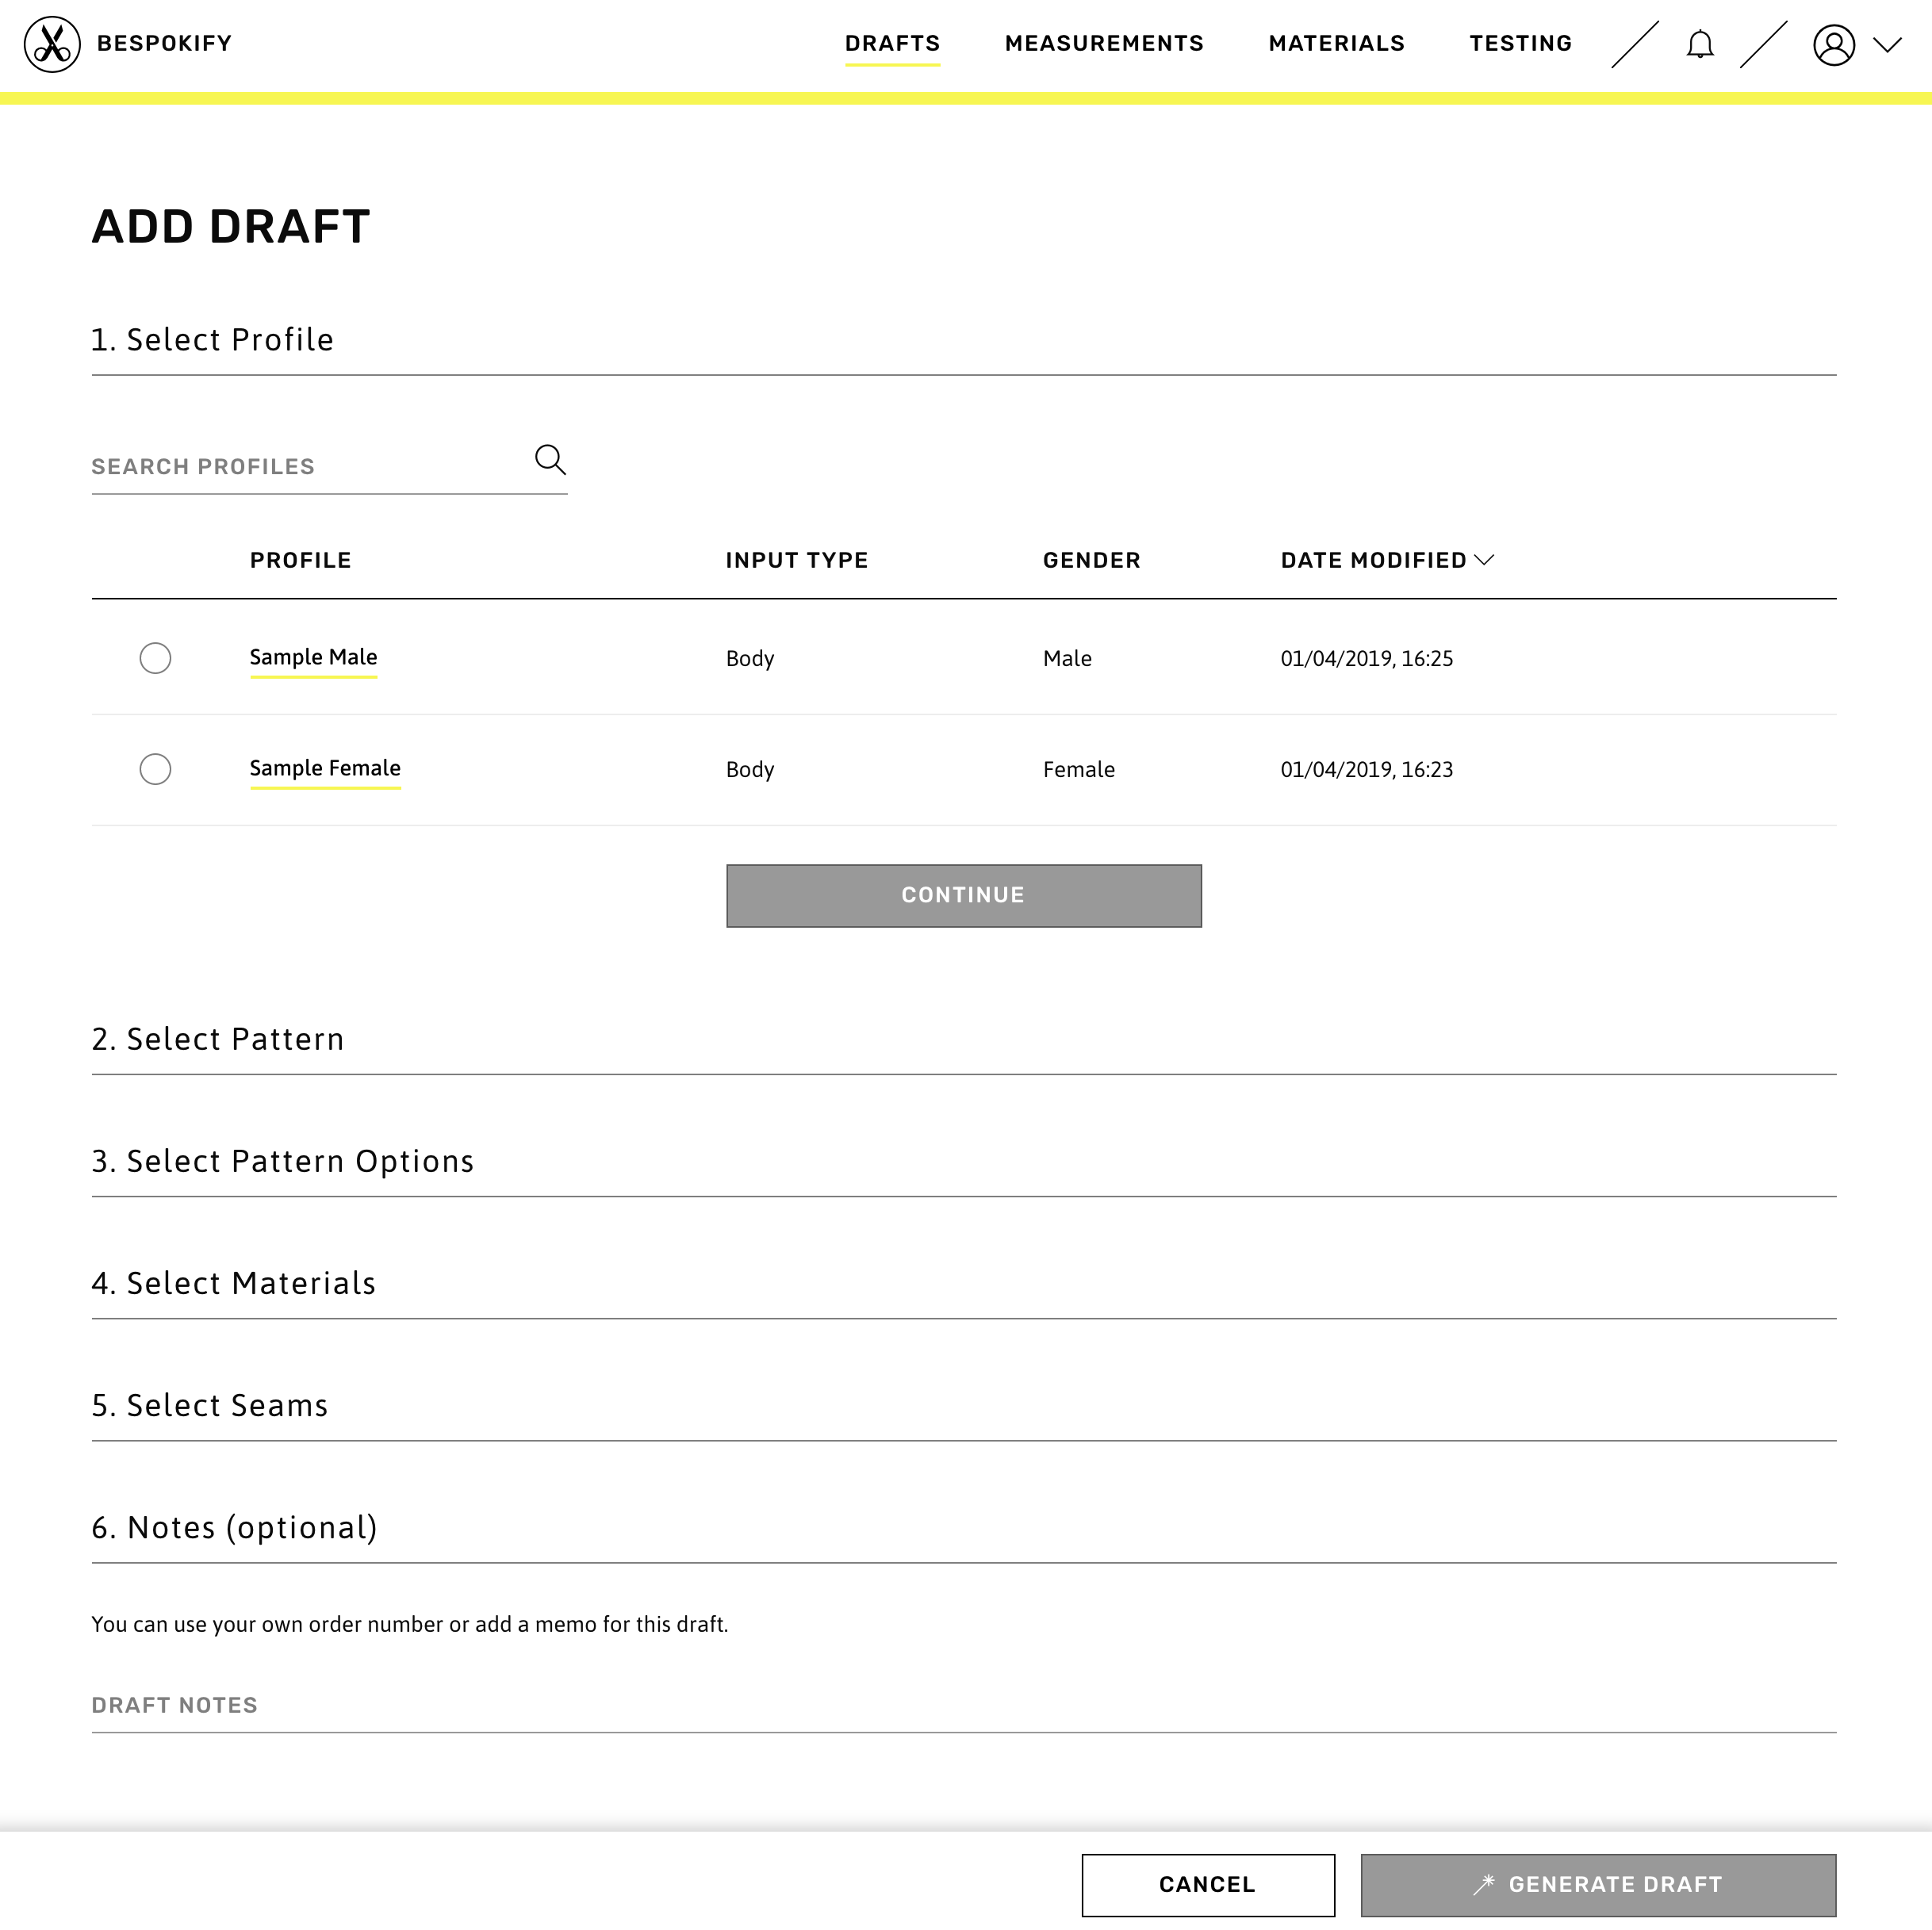
1. Select Profile
The first step to create a new draft is to select a Measurement Profile. The details for a profile can be viewed in a popup by clicking on the name.
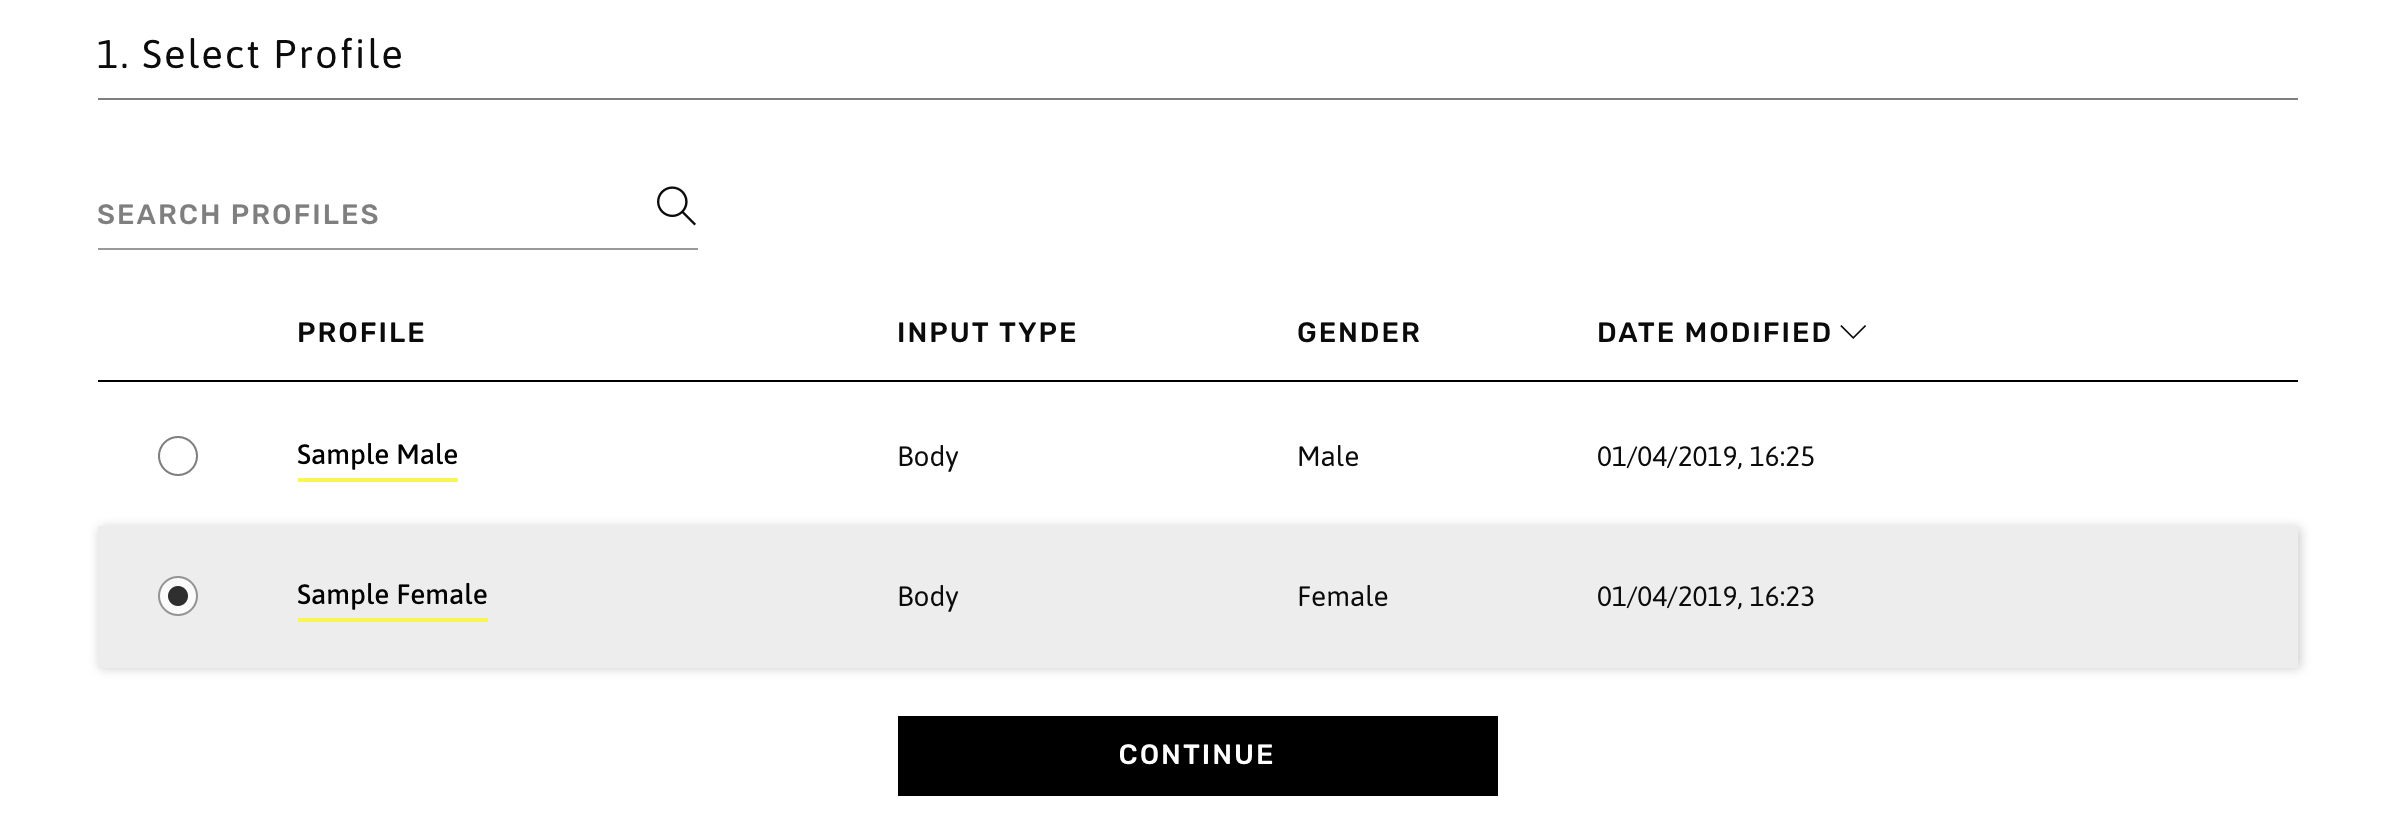
To advance to the next section, the user must press Continue.
2. Select Pattern
In the next step, a pattern library must be selected from the list. Patterns can have different presets that users can choose from.
Draft presets help users get through the next steps faster by having pre-selected pattern options. The Default preset has no pre-selected options so users can customise their draft as they see fit. Additional presets can be created in the Draft Presets section.
Lastly, the Ref ID field allows users to select a specific version of the pattern. Certain libraries are updated regularly via new version releases so users are able to choose a version that they feel happy with or choose the latest one by leaving the option set to master.
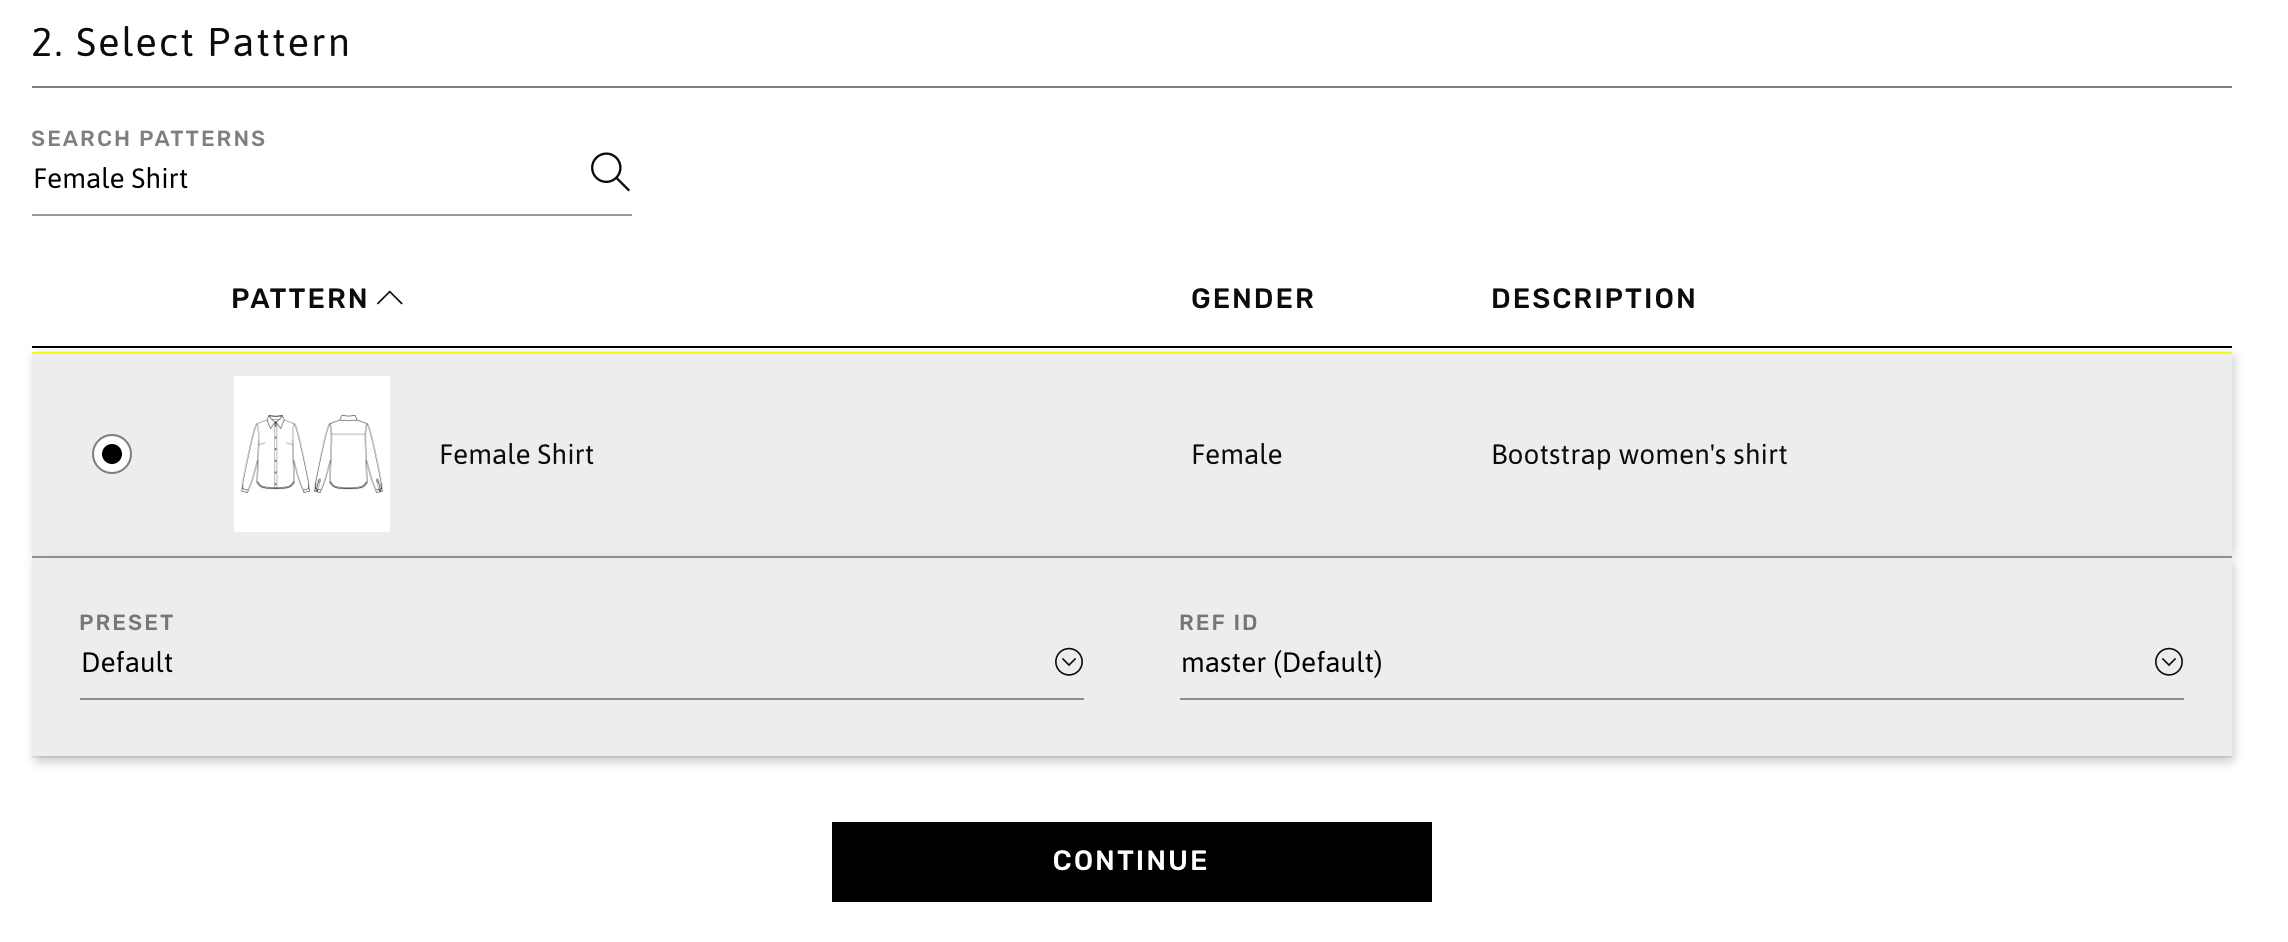
To advance to the next section, the user must press Continue.
3. Select Pattern Options
The Pattern Options section lists the variants (Fit, Neck Ease, Length, etc.) for the chosen pattern and the available options for each variant (for the Fit variant: Super Slim, Slim, Regular, Full, and Custom).
Some options will have a star icon on them indicating that it is our recommended choice.
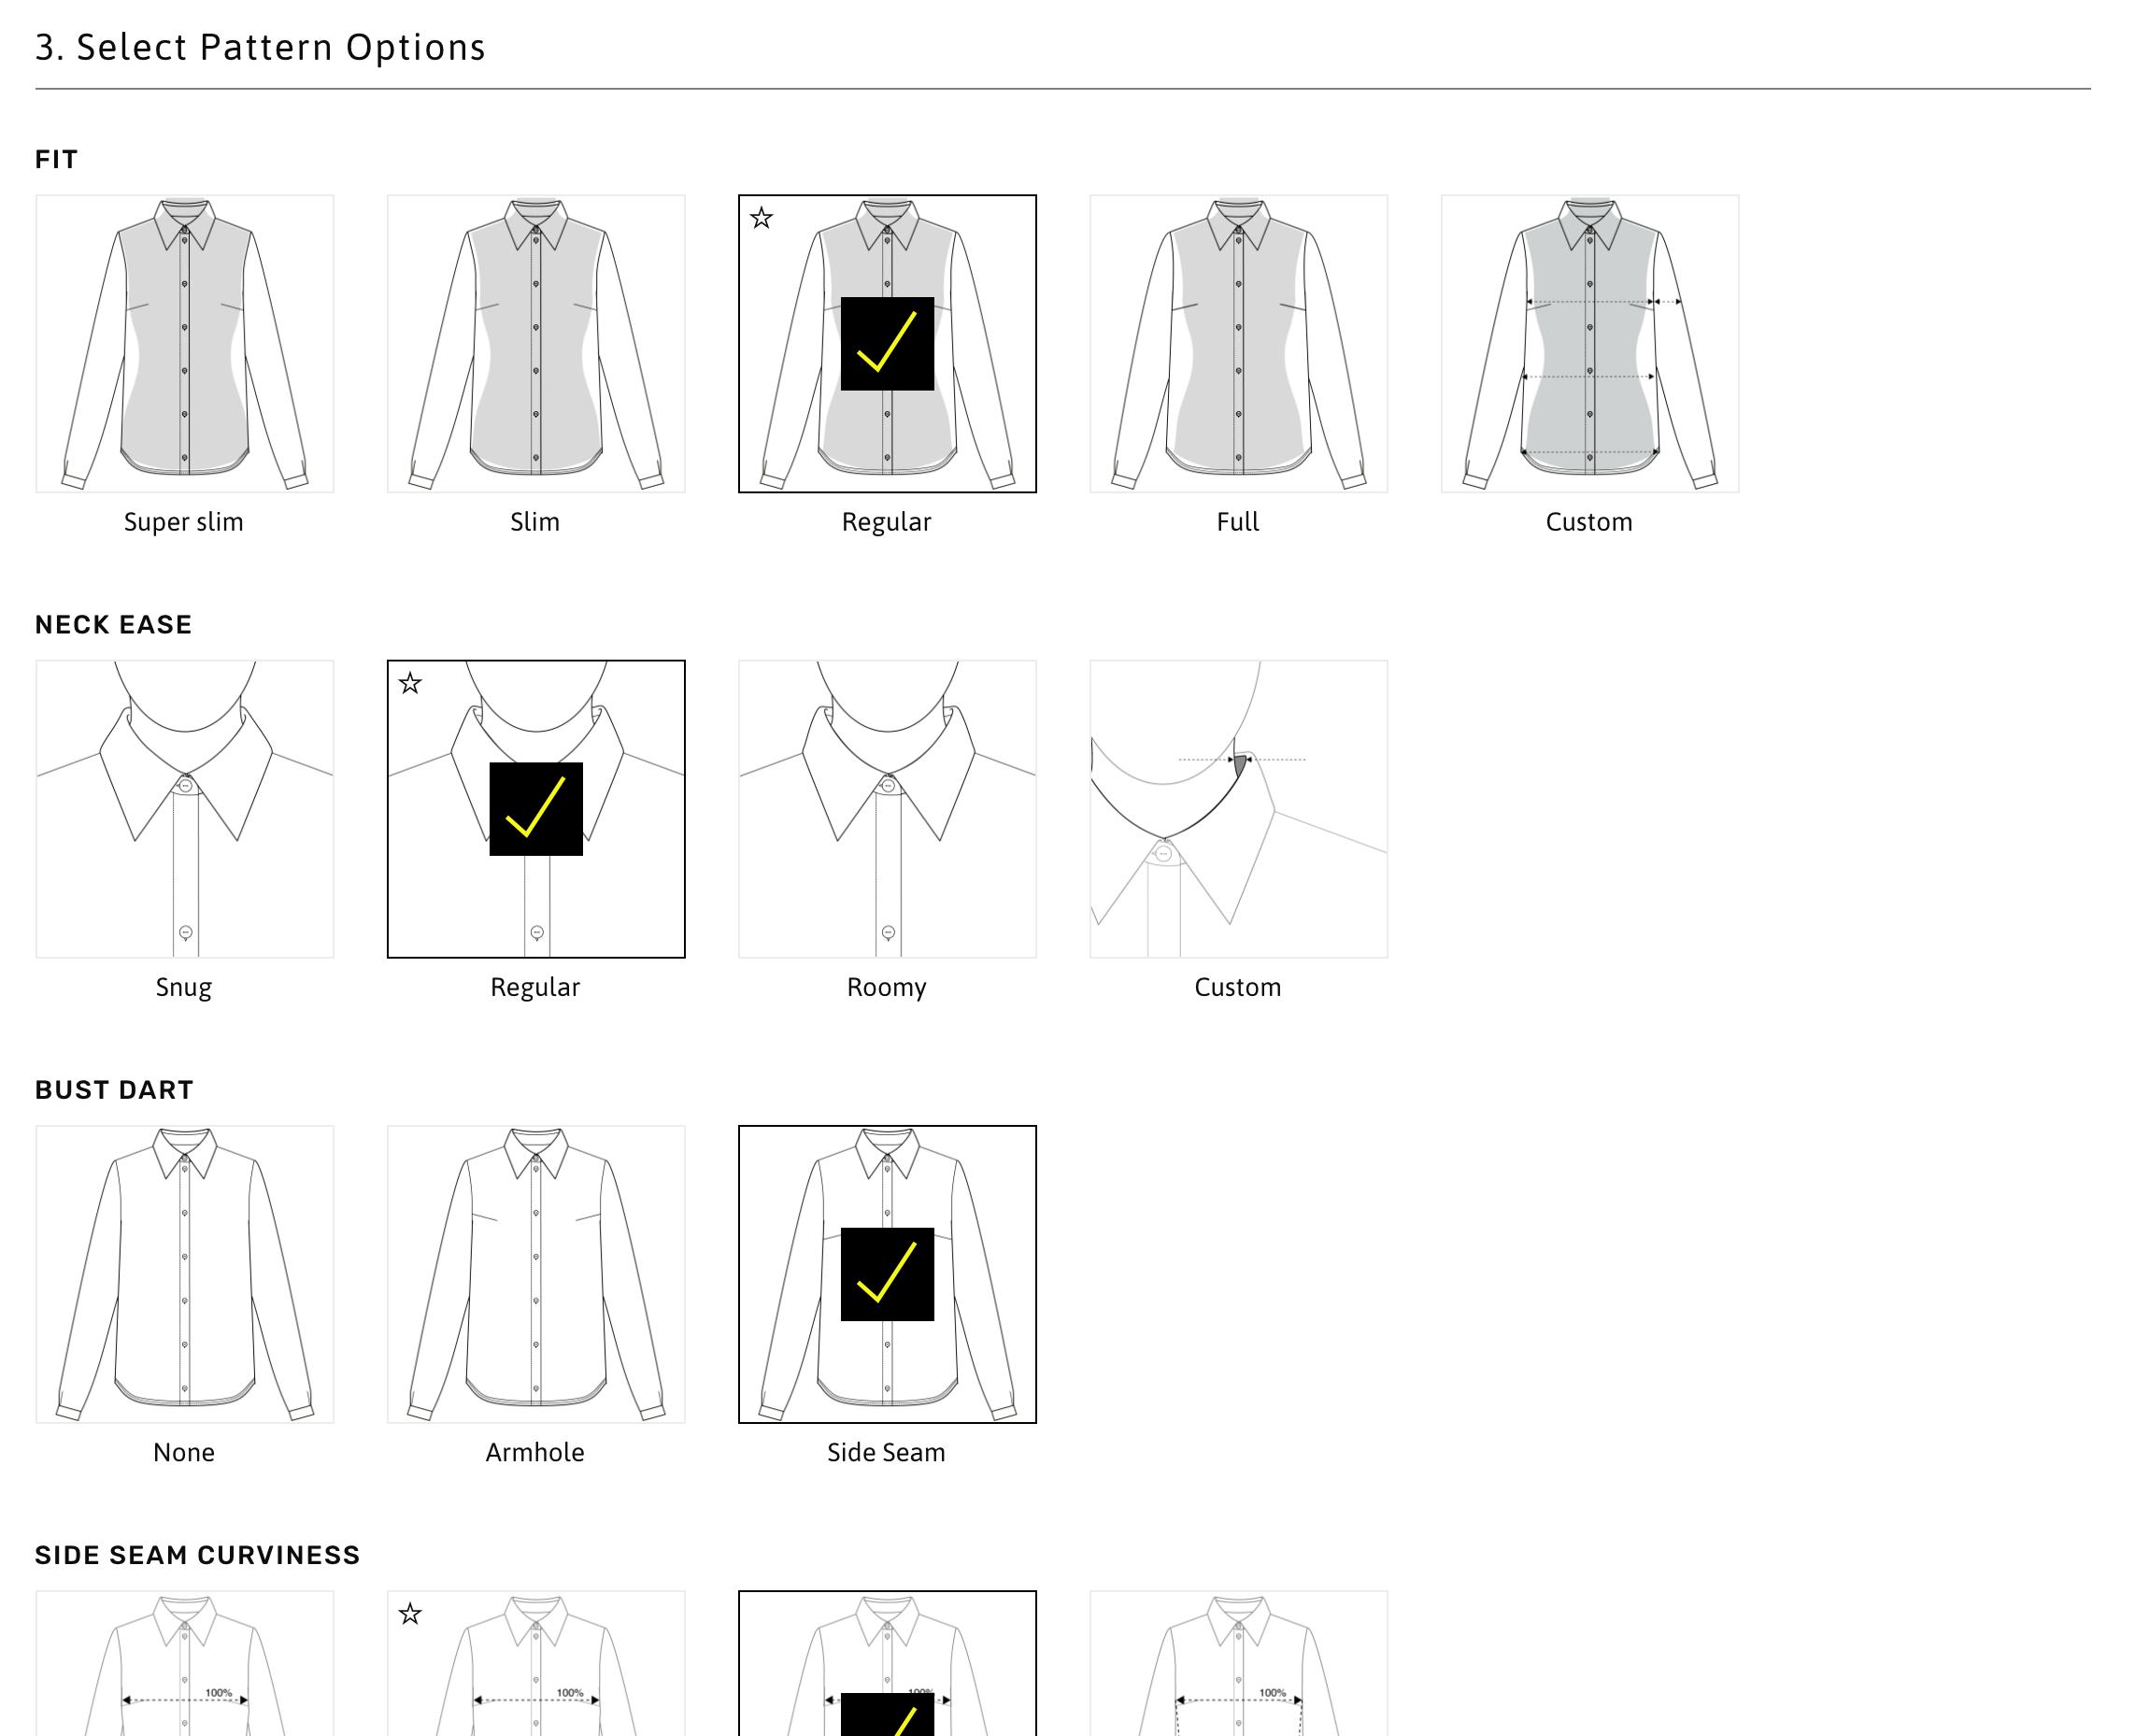
Some options can also be variants and contain additional choices for users. For example, if None is selected for the Yoke variant, additional options will be shown for Back Details.
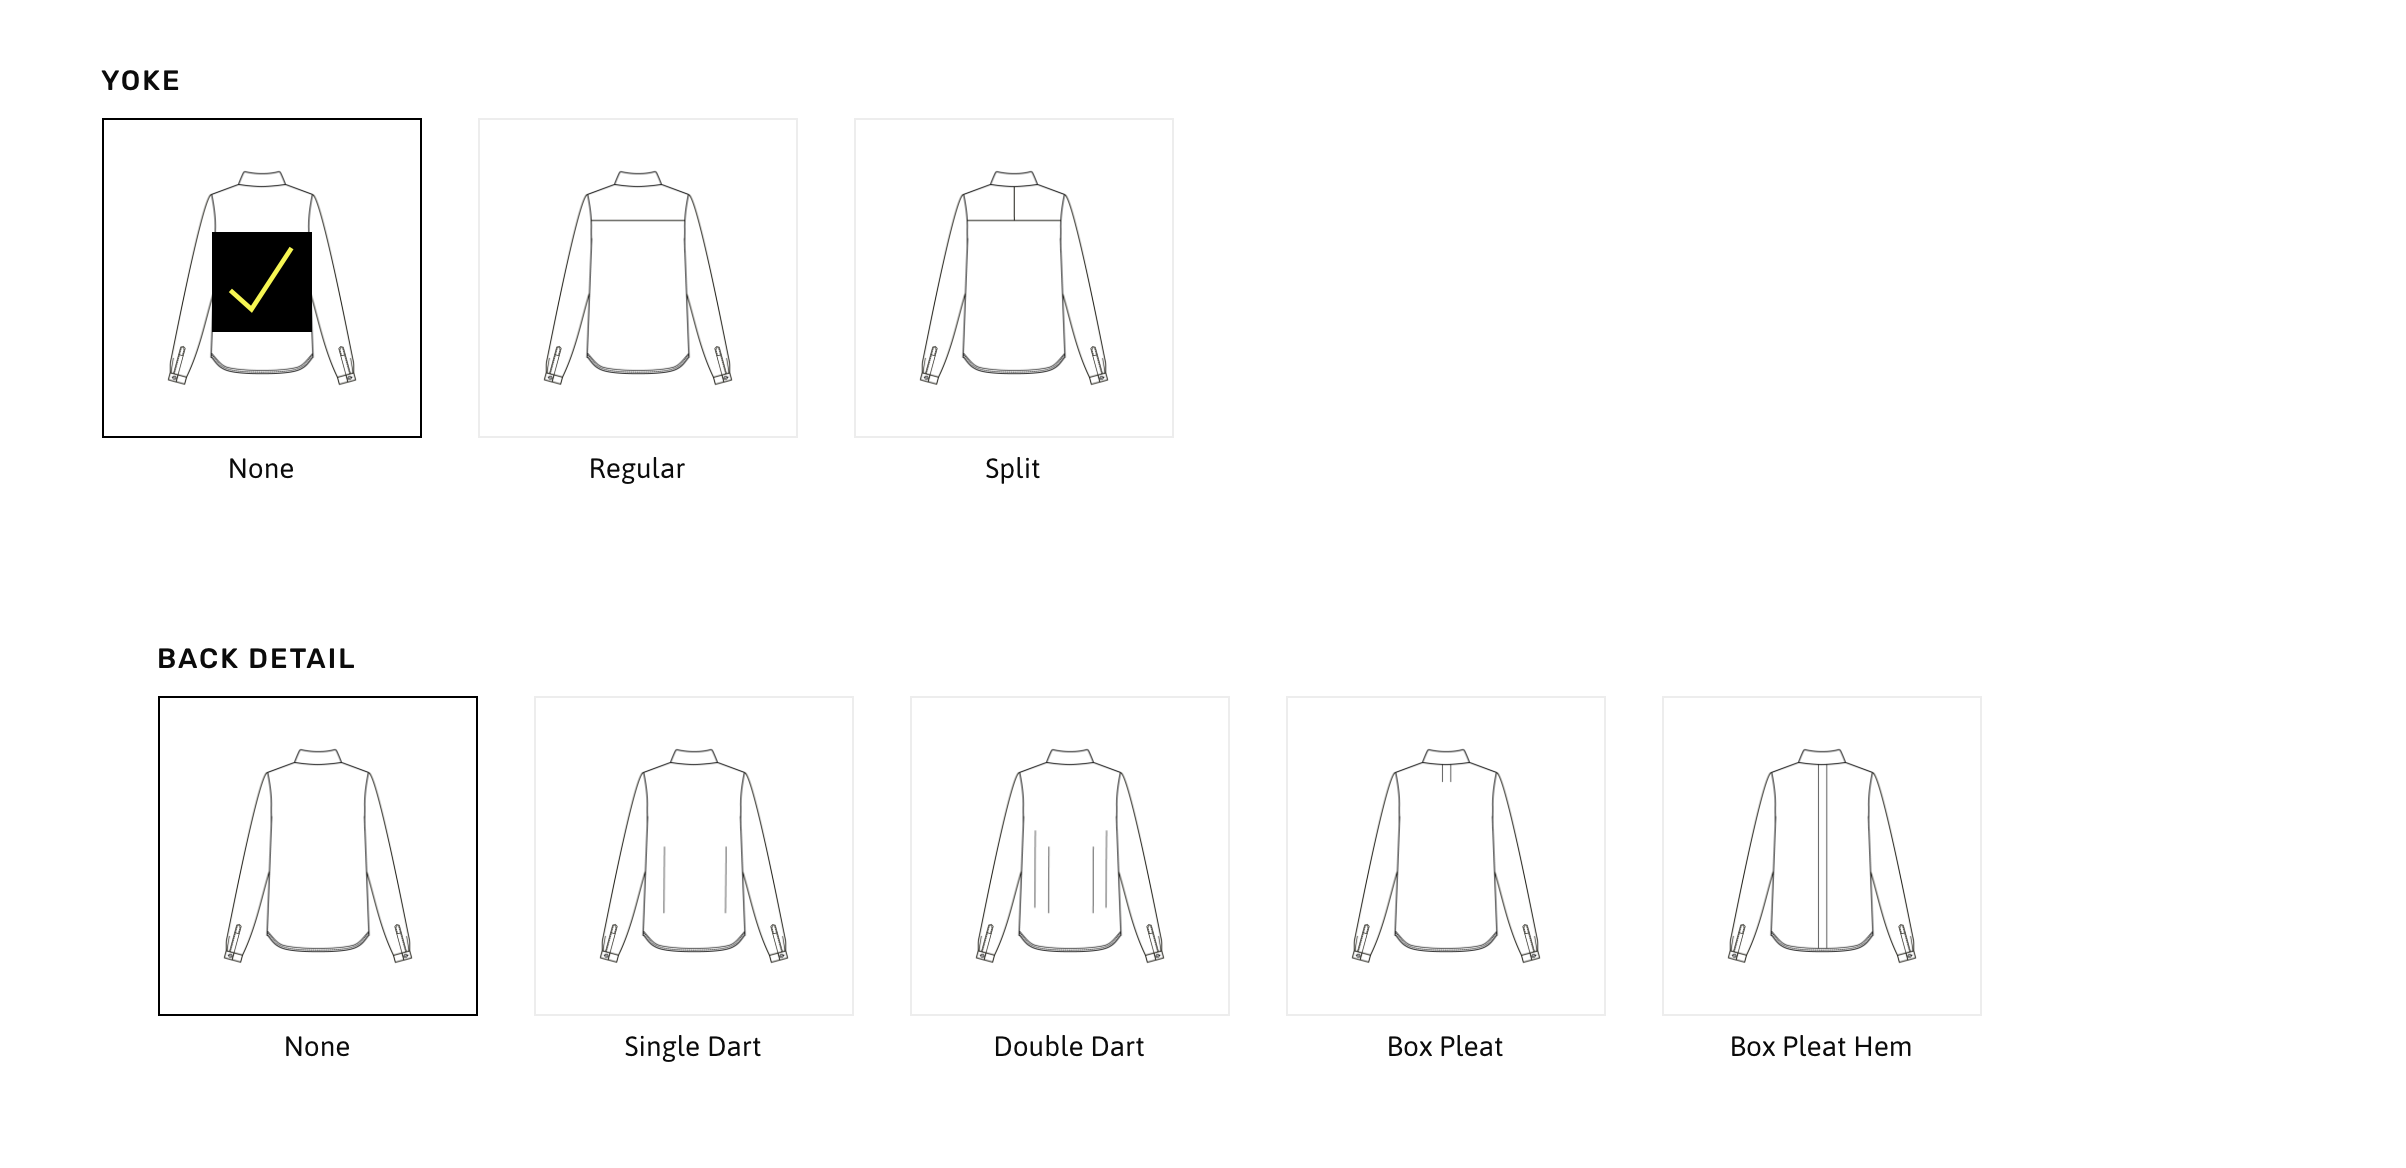
Once options are selected for all the variants, the user must press Continue to move on to the next section.
4. Select Materials
In this section, Materials are selected for different garment parts. By default, the Paper material will always be available.
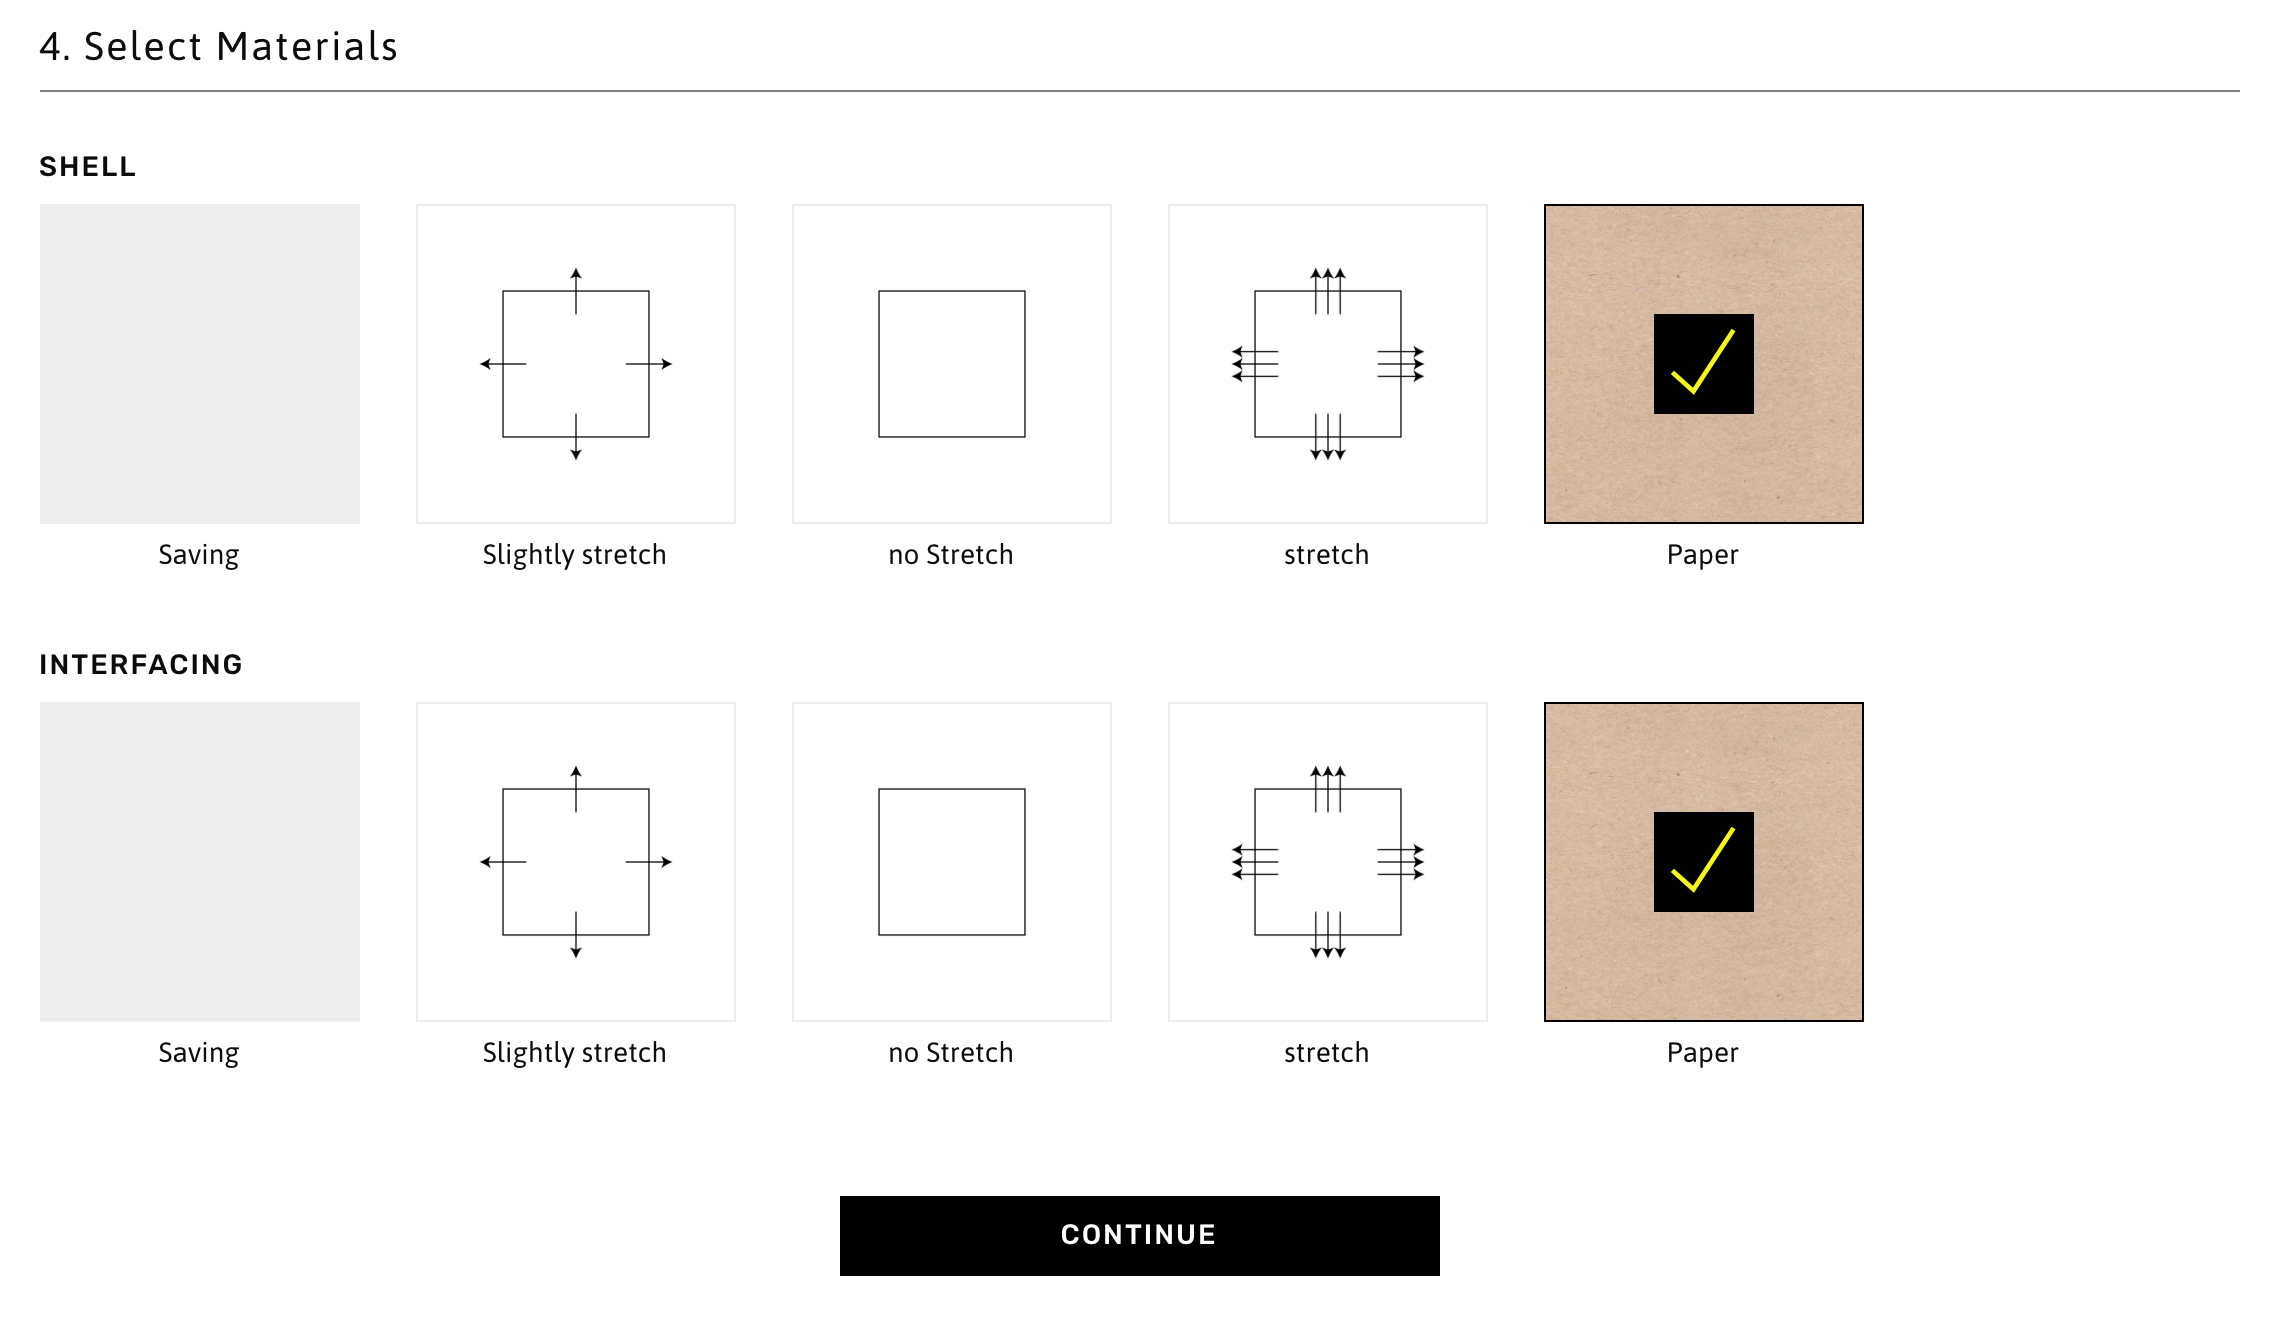
To advance to the next section, the user must press Continue.
5. Select Seams
The Seam Selection portion of the process will present a list of optimal seam values for the garment. It is not necessary to change these values, but if a user wishes to update them, there is an Edit link at the top right corner. This allows the seam values to be modified.
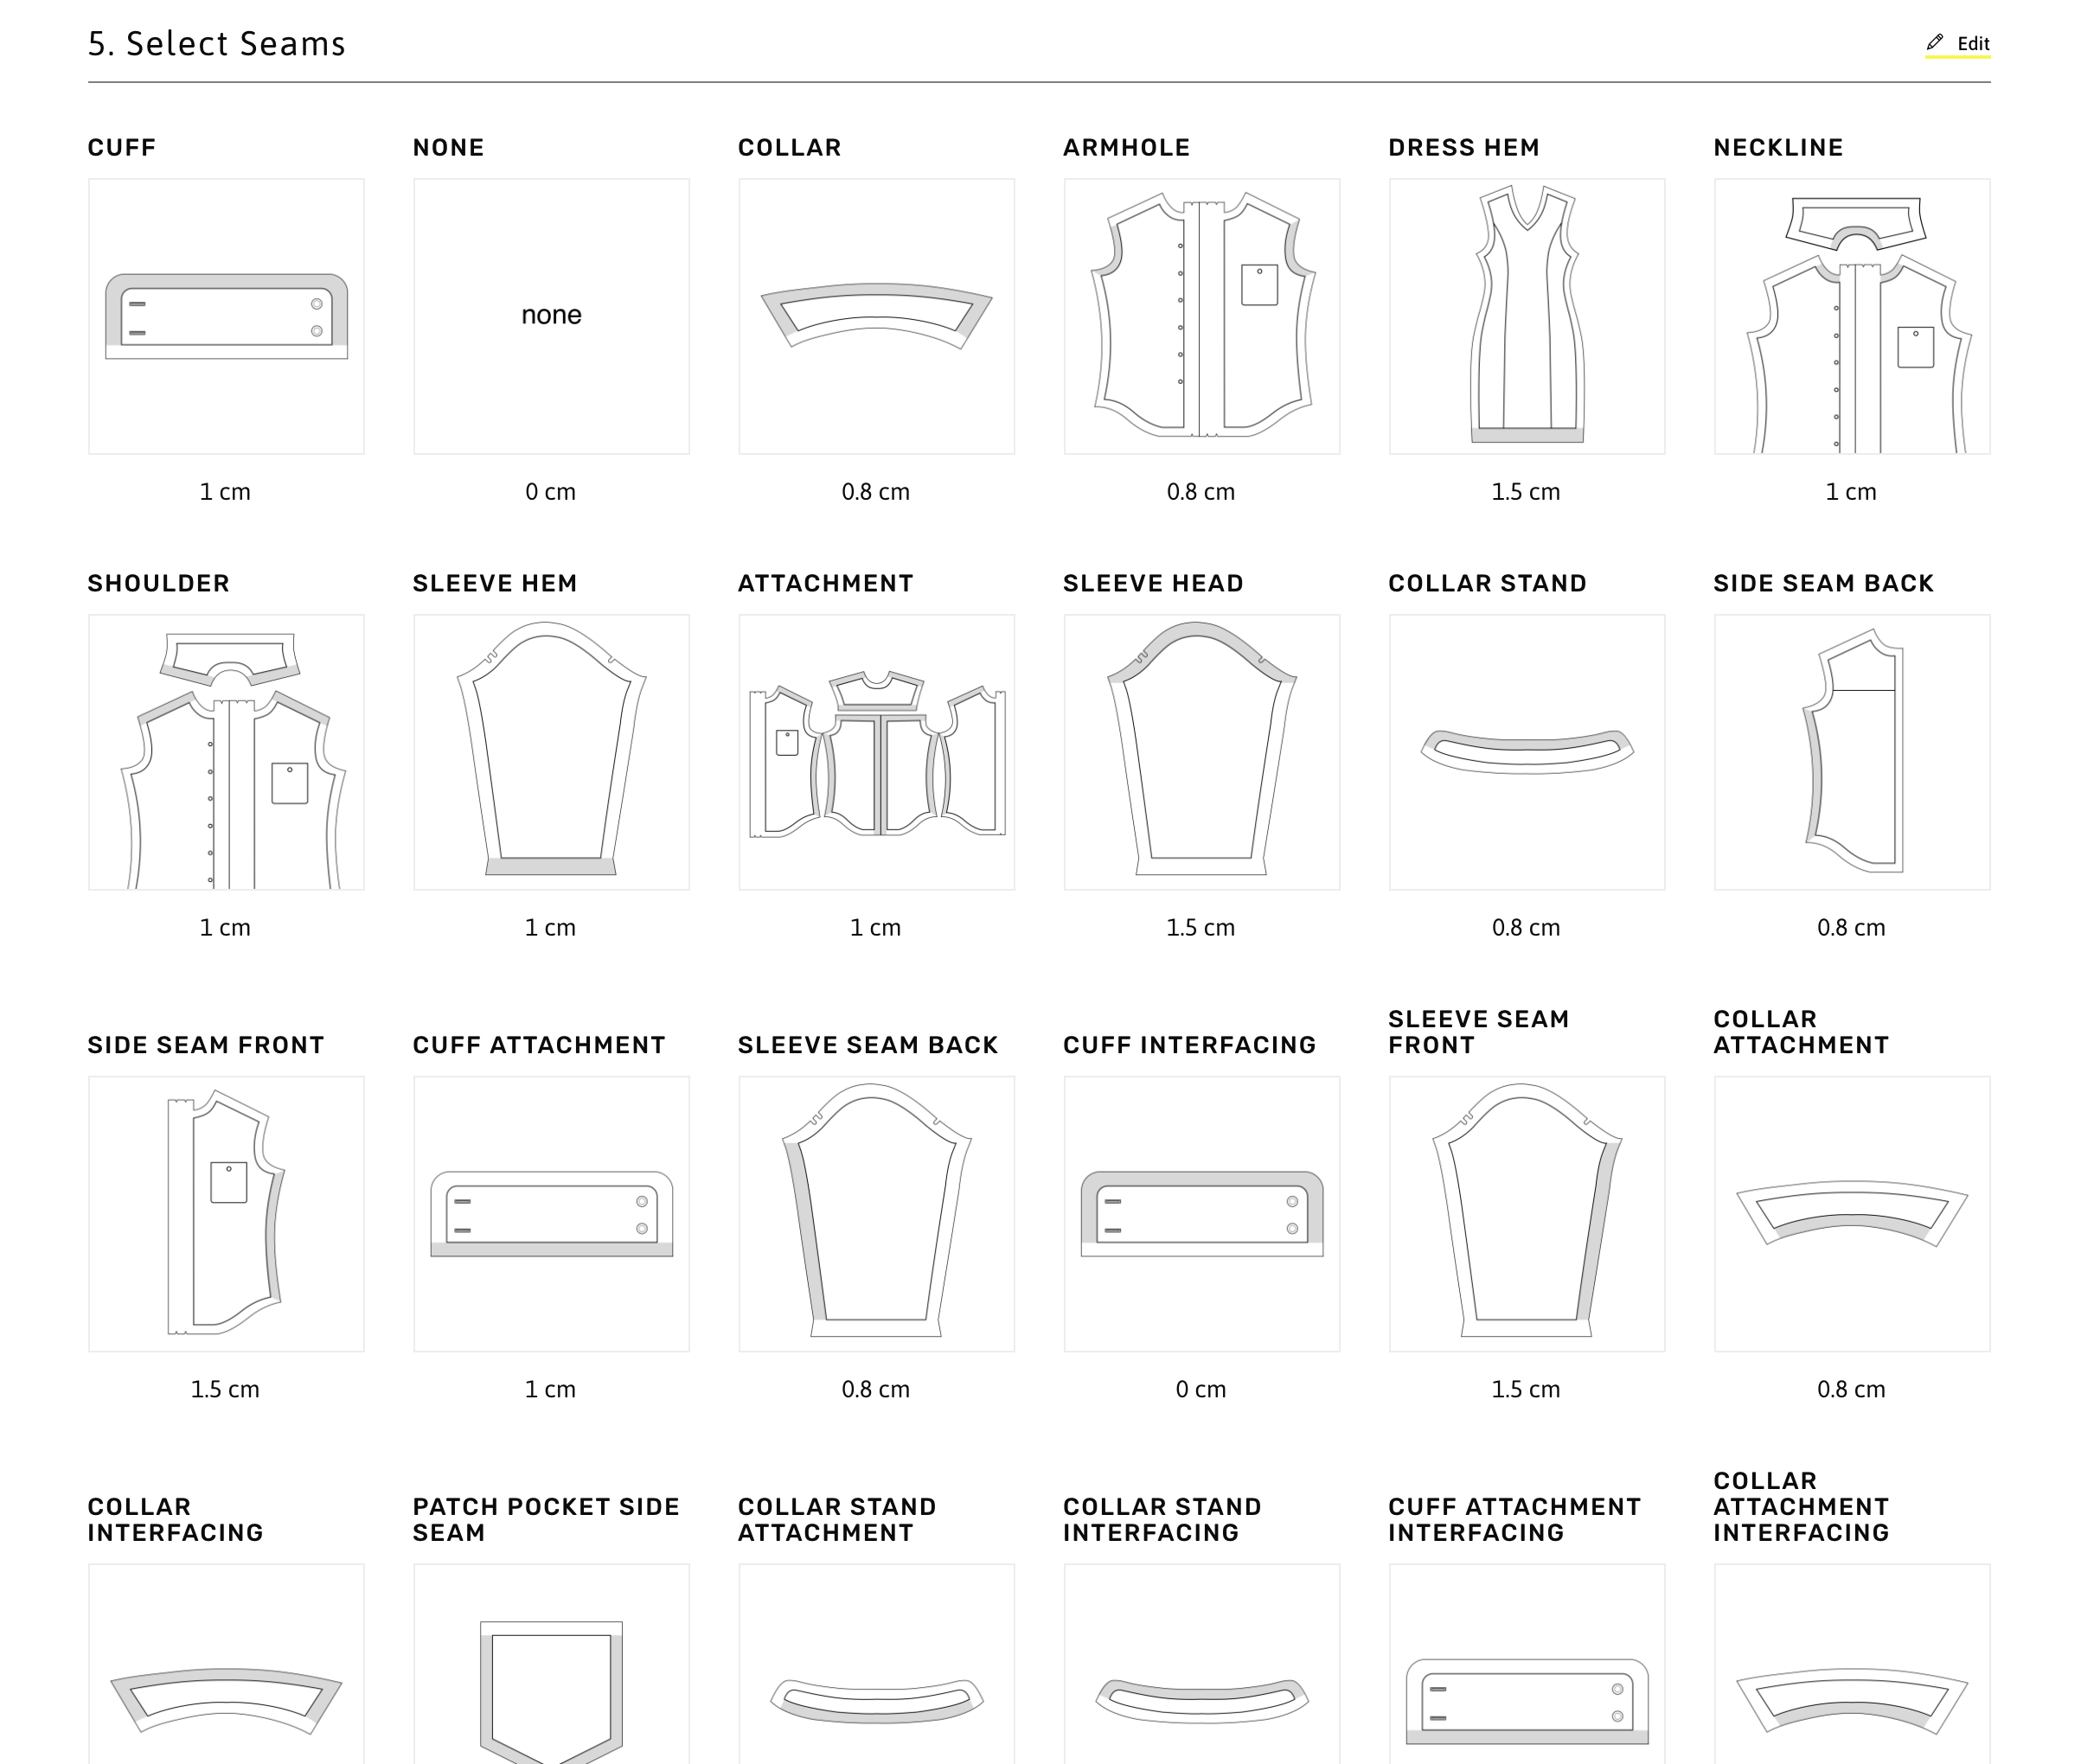
To advance to the next section, the user must press Continue.
6. Notes
In the final section, users may optionally include a note or memo for the draft. The draft creation process is finalised by pressing the Generate Draft button.

Users will then be taken back to the main Drafts page. A notification will indicate that the draft is In Process of being generated. Once the draft is complete, the status will change to Completed and a notification (under the notification bell icon shown below) will also inform the user.

Tech Pack and Draft Exports
A Tech Pack is a summary of all the data (measurement profile, pattern and seam options, materials used, and garment measurements) in the generation of the draft.
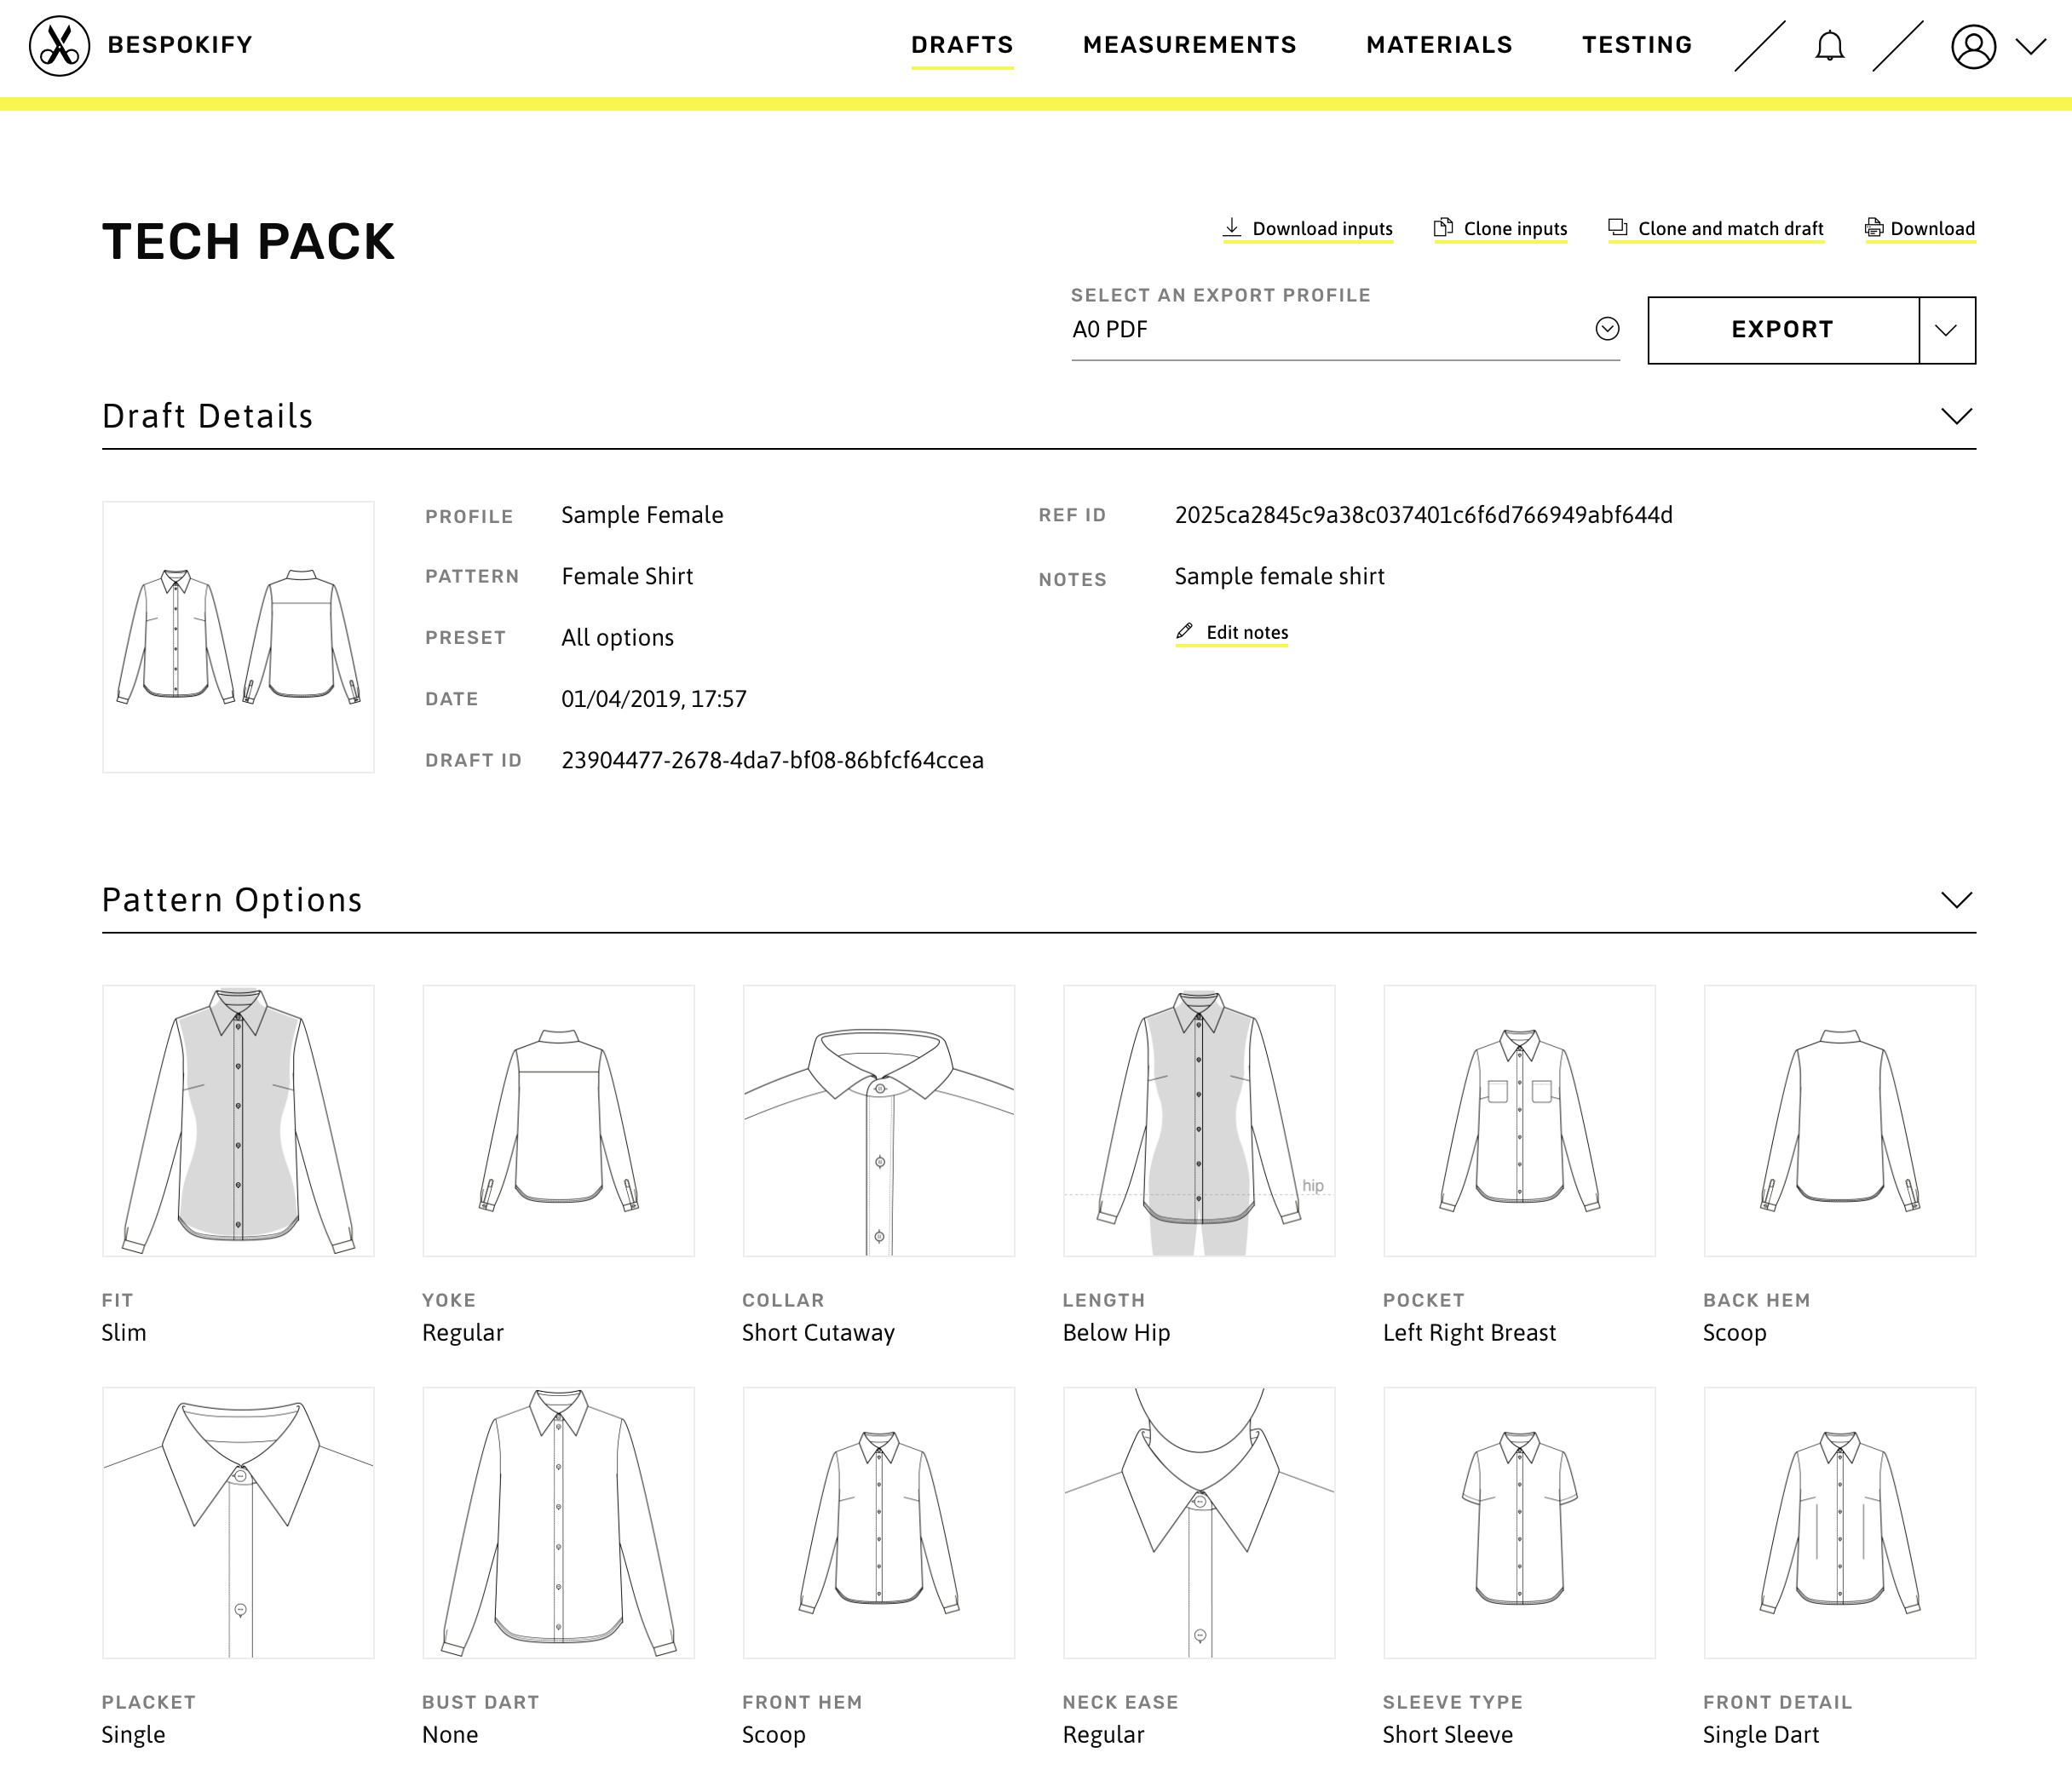
Users may download the tech pack by clicking on the Download link (with the printer icon) in the top right corner. This will generate a PDF with the same information shown on screen. The Download inputs link will instead download the raw input details for the draft in a yml format.
From the Tech Pack, users can also export the full draft in a variety of formats. These formats are managed in the Export Profiles section of Configurations. To download the printable draft to be used for the cutting process, users can select their desired format and then press the Export button.
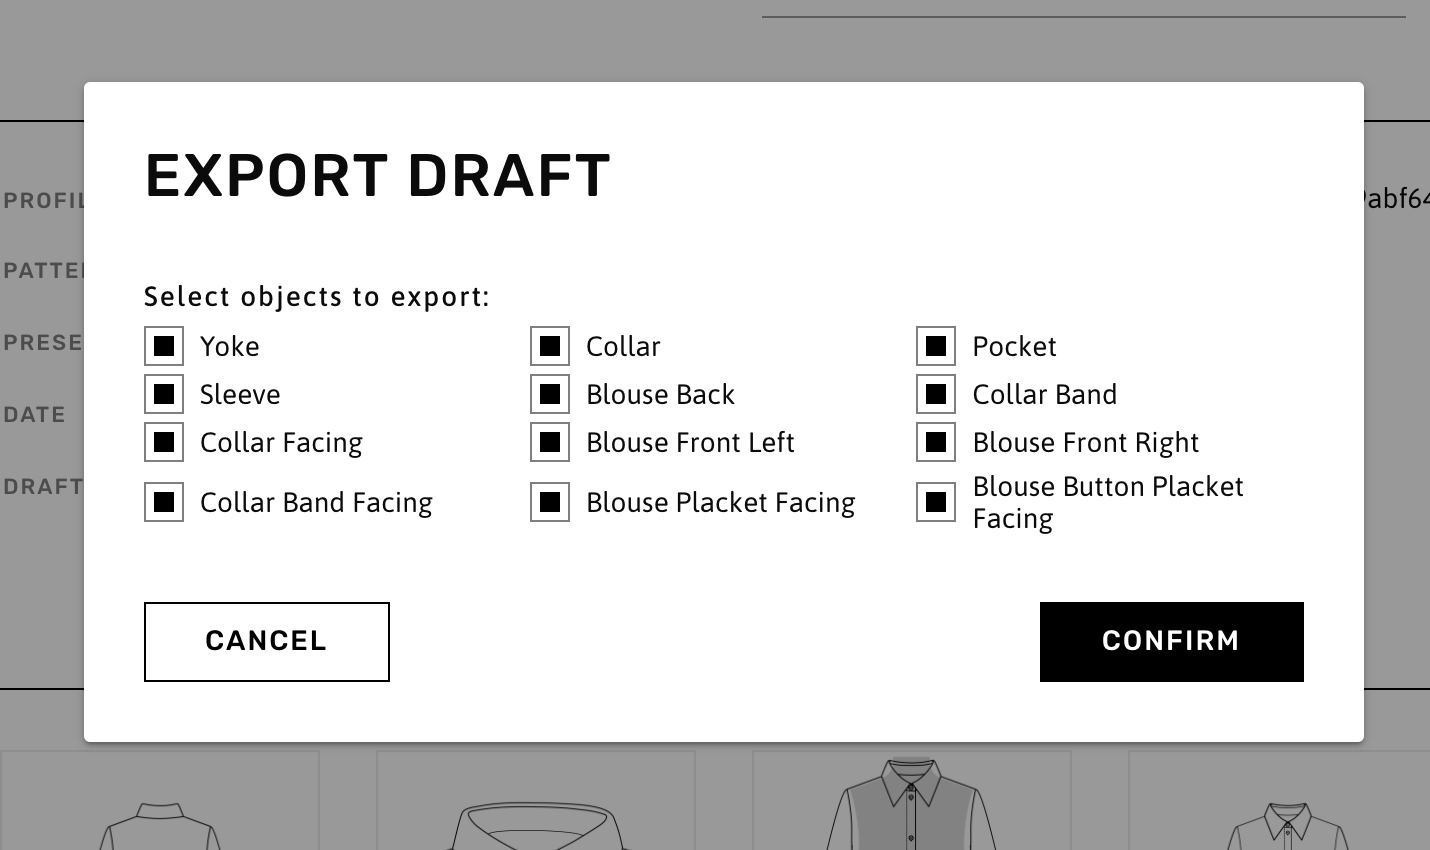
It is also possible to generate an export of specific pattern pieces. The Custom Export option is located next to the Export button and offers users the possibility to choose which pattern pieces should be export part of that export.
Clone a draft
Drafts cannot be edited. Once they are generated, the only options available to modify them are two forms of cloning: Clone inputs and Clone and match draft.
Clone inputs

This option creates an exact copy of the draft ready for generation. It presents the user at the final step of creating a new draft to simply click on the Generate draft button, using the same inputs as the original draft.
Users have the option to go back to any of the previous steps (except Select Profile) and modify any of the inputs for Pattern Selection, Pattern Options, Material Selection, and Seam Selection.
Once the desired inputs are modified, the user clicks on Generate draft and the draft is placed in the generation queue.
Clone and match draft

This option is used when the user wishes to create a duplicate of a draft, but make adjustments directly to the garment measurements. It is similar to the previous option in that it copies the inputs from the original draft. However, it does not allow the user to modify any of the inputs. Instead, it features an additional section called Target Garment Measurements which can be activated by pressing the Edit link in the section's heading.
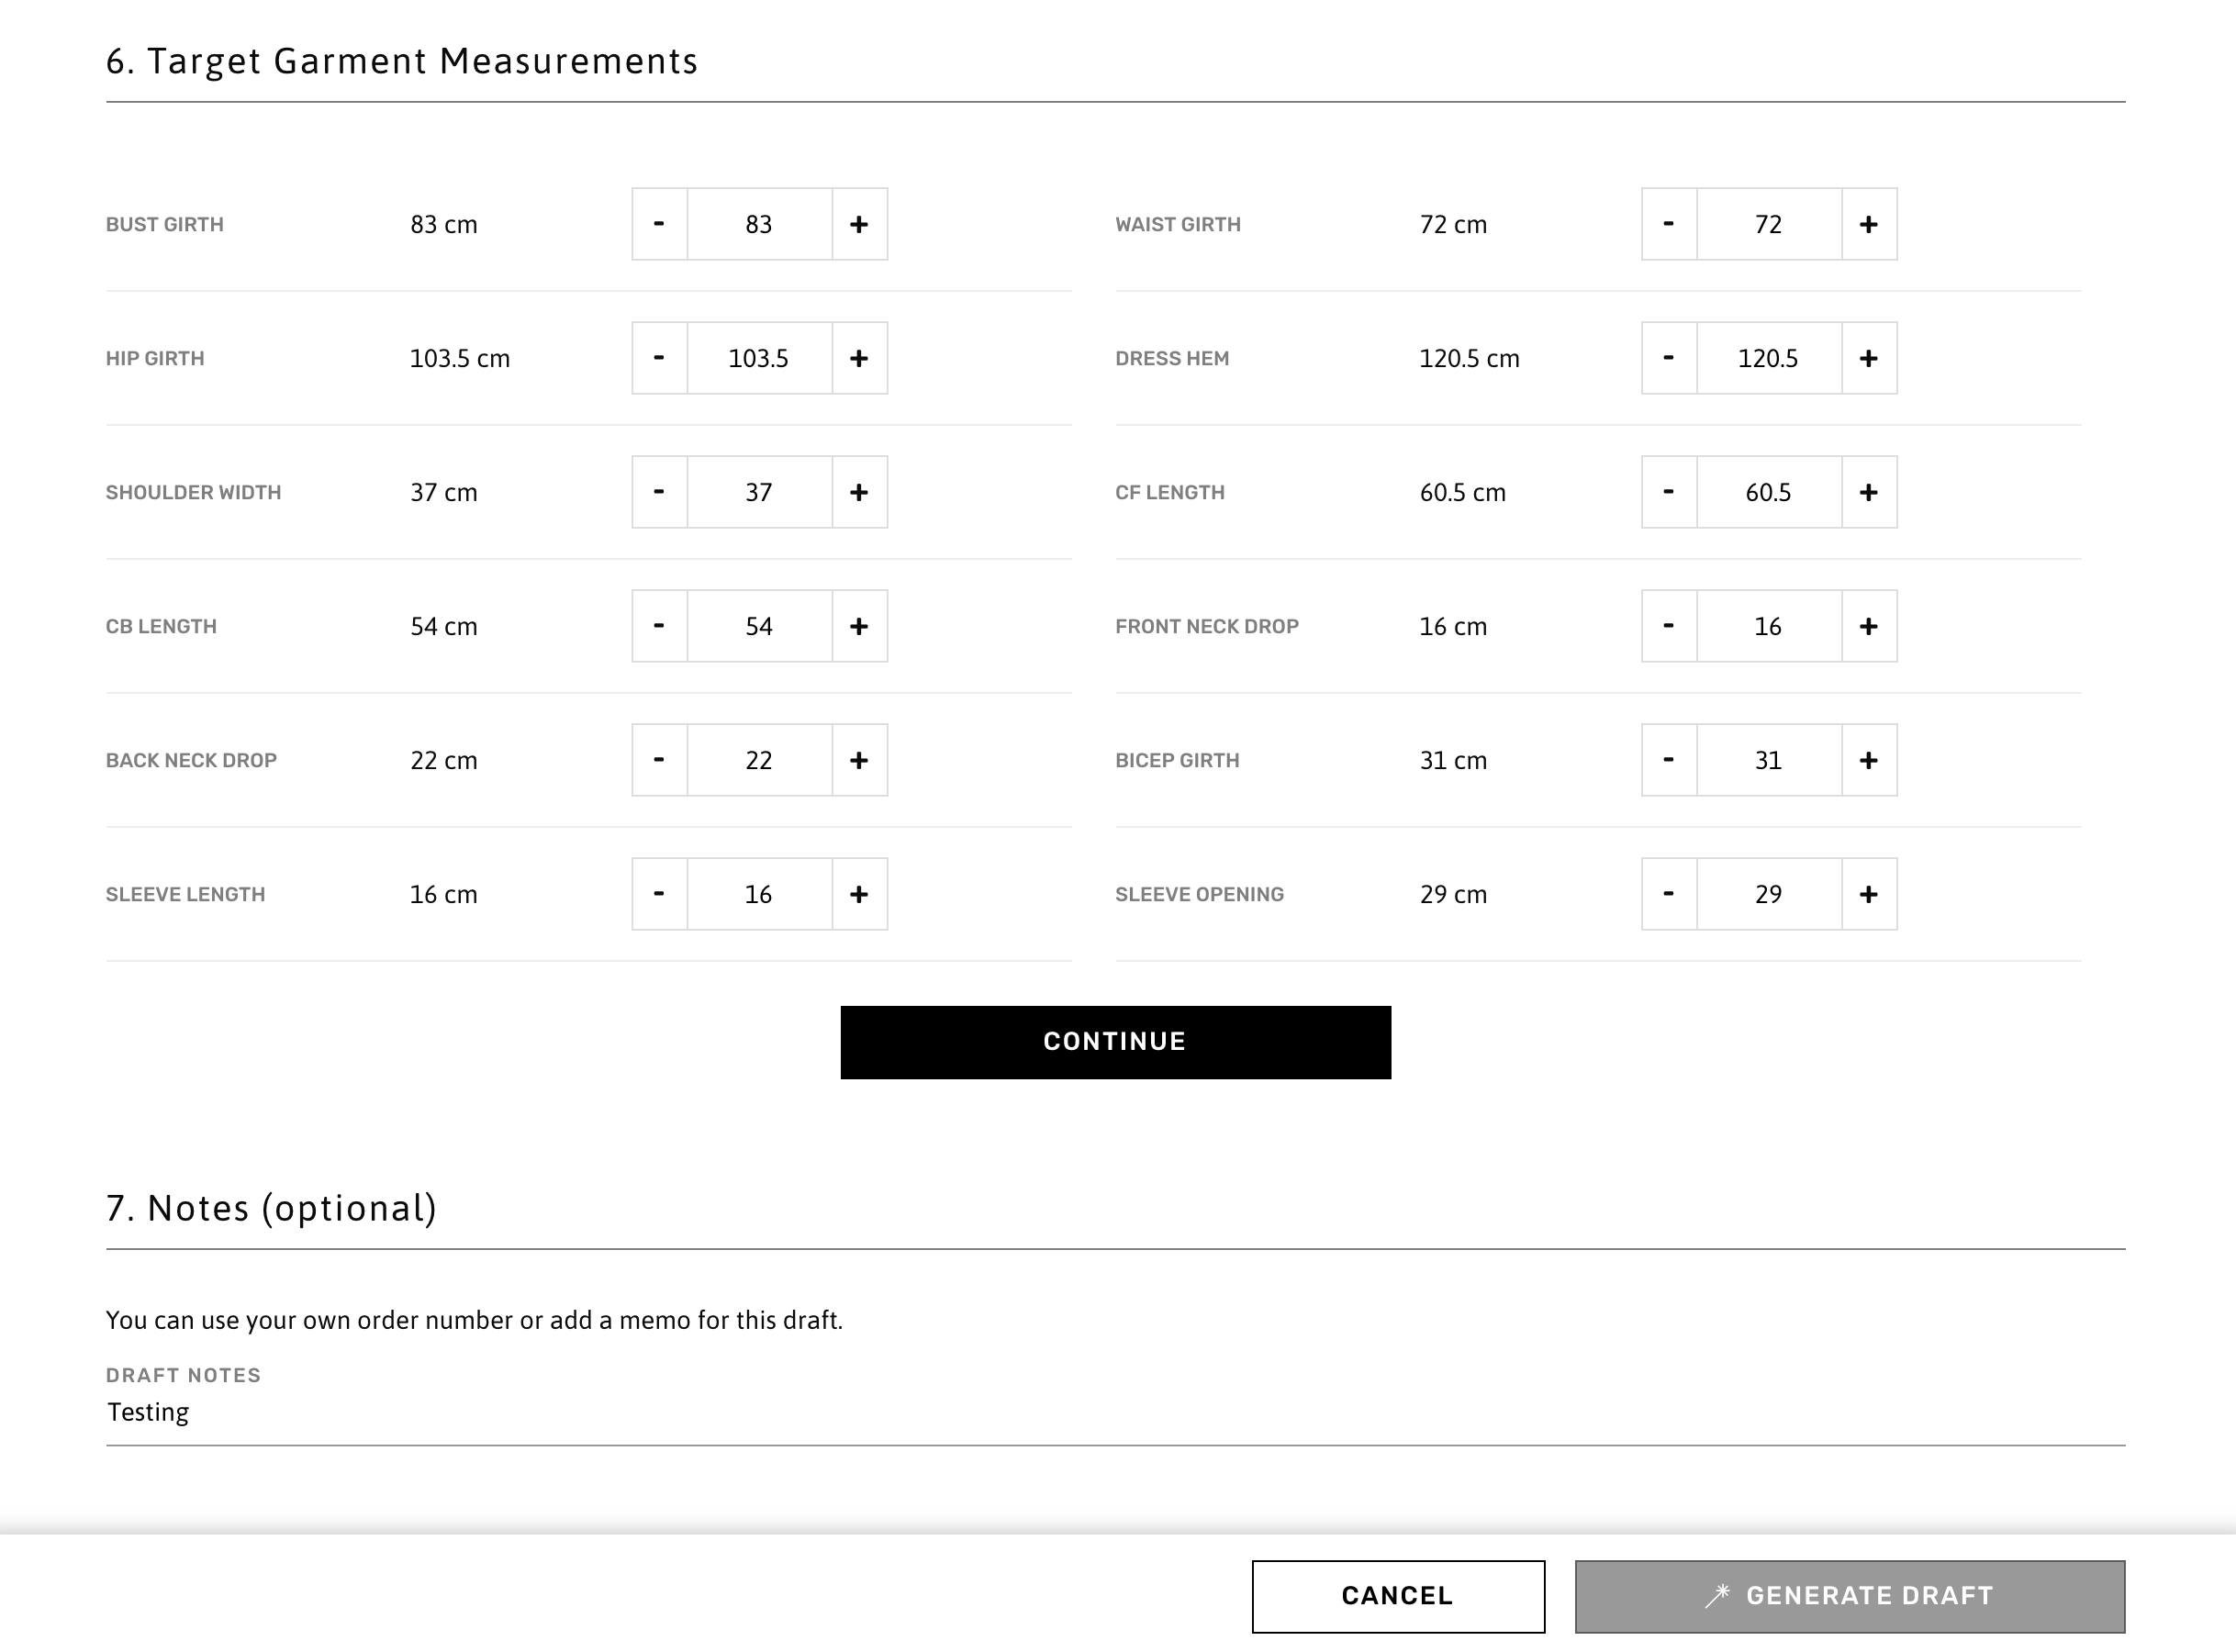
Users will see the garment's measurement name, current measurement, and a field to enter the target measurement. When the new draft is generated, the system will match these target measurements.
Delete a draft
Drafts cannot be deleted.
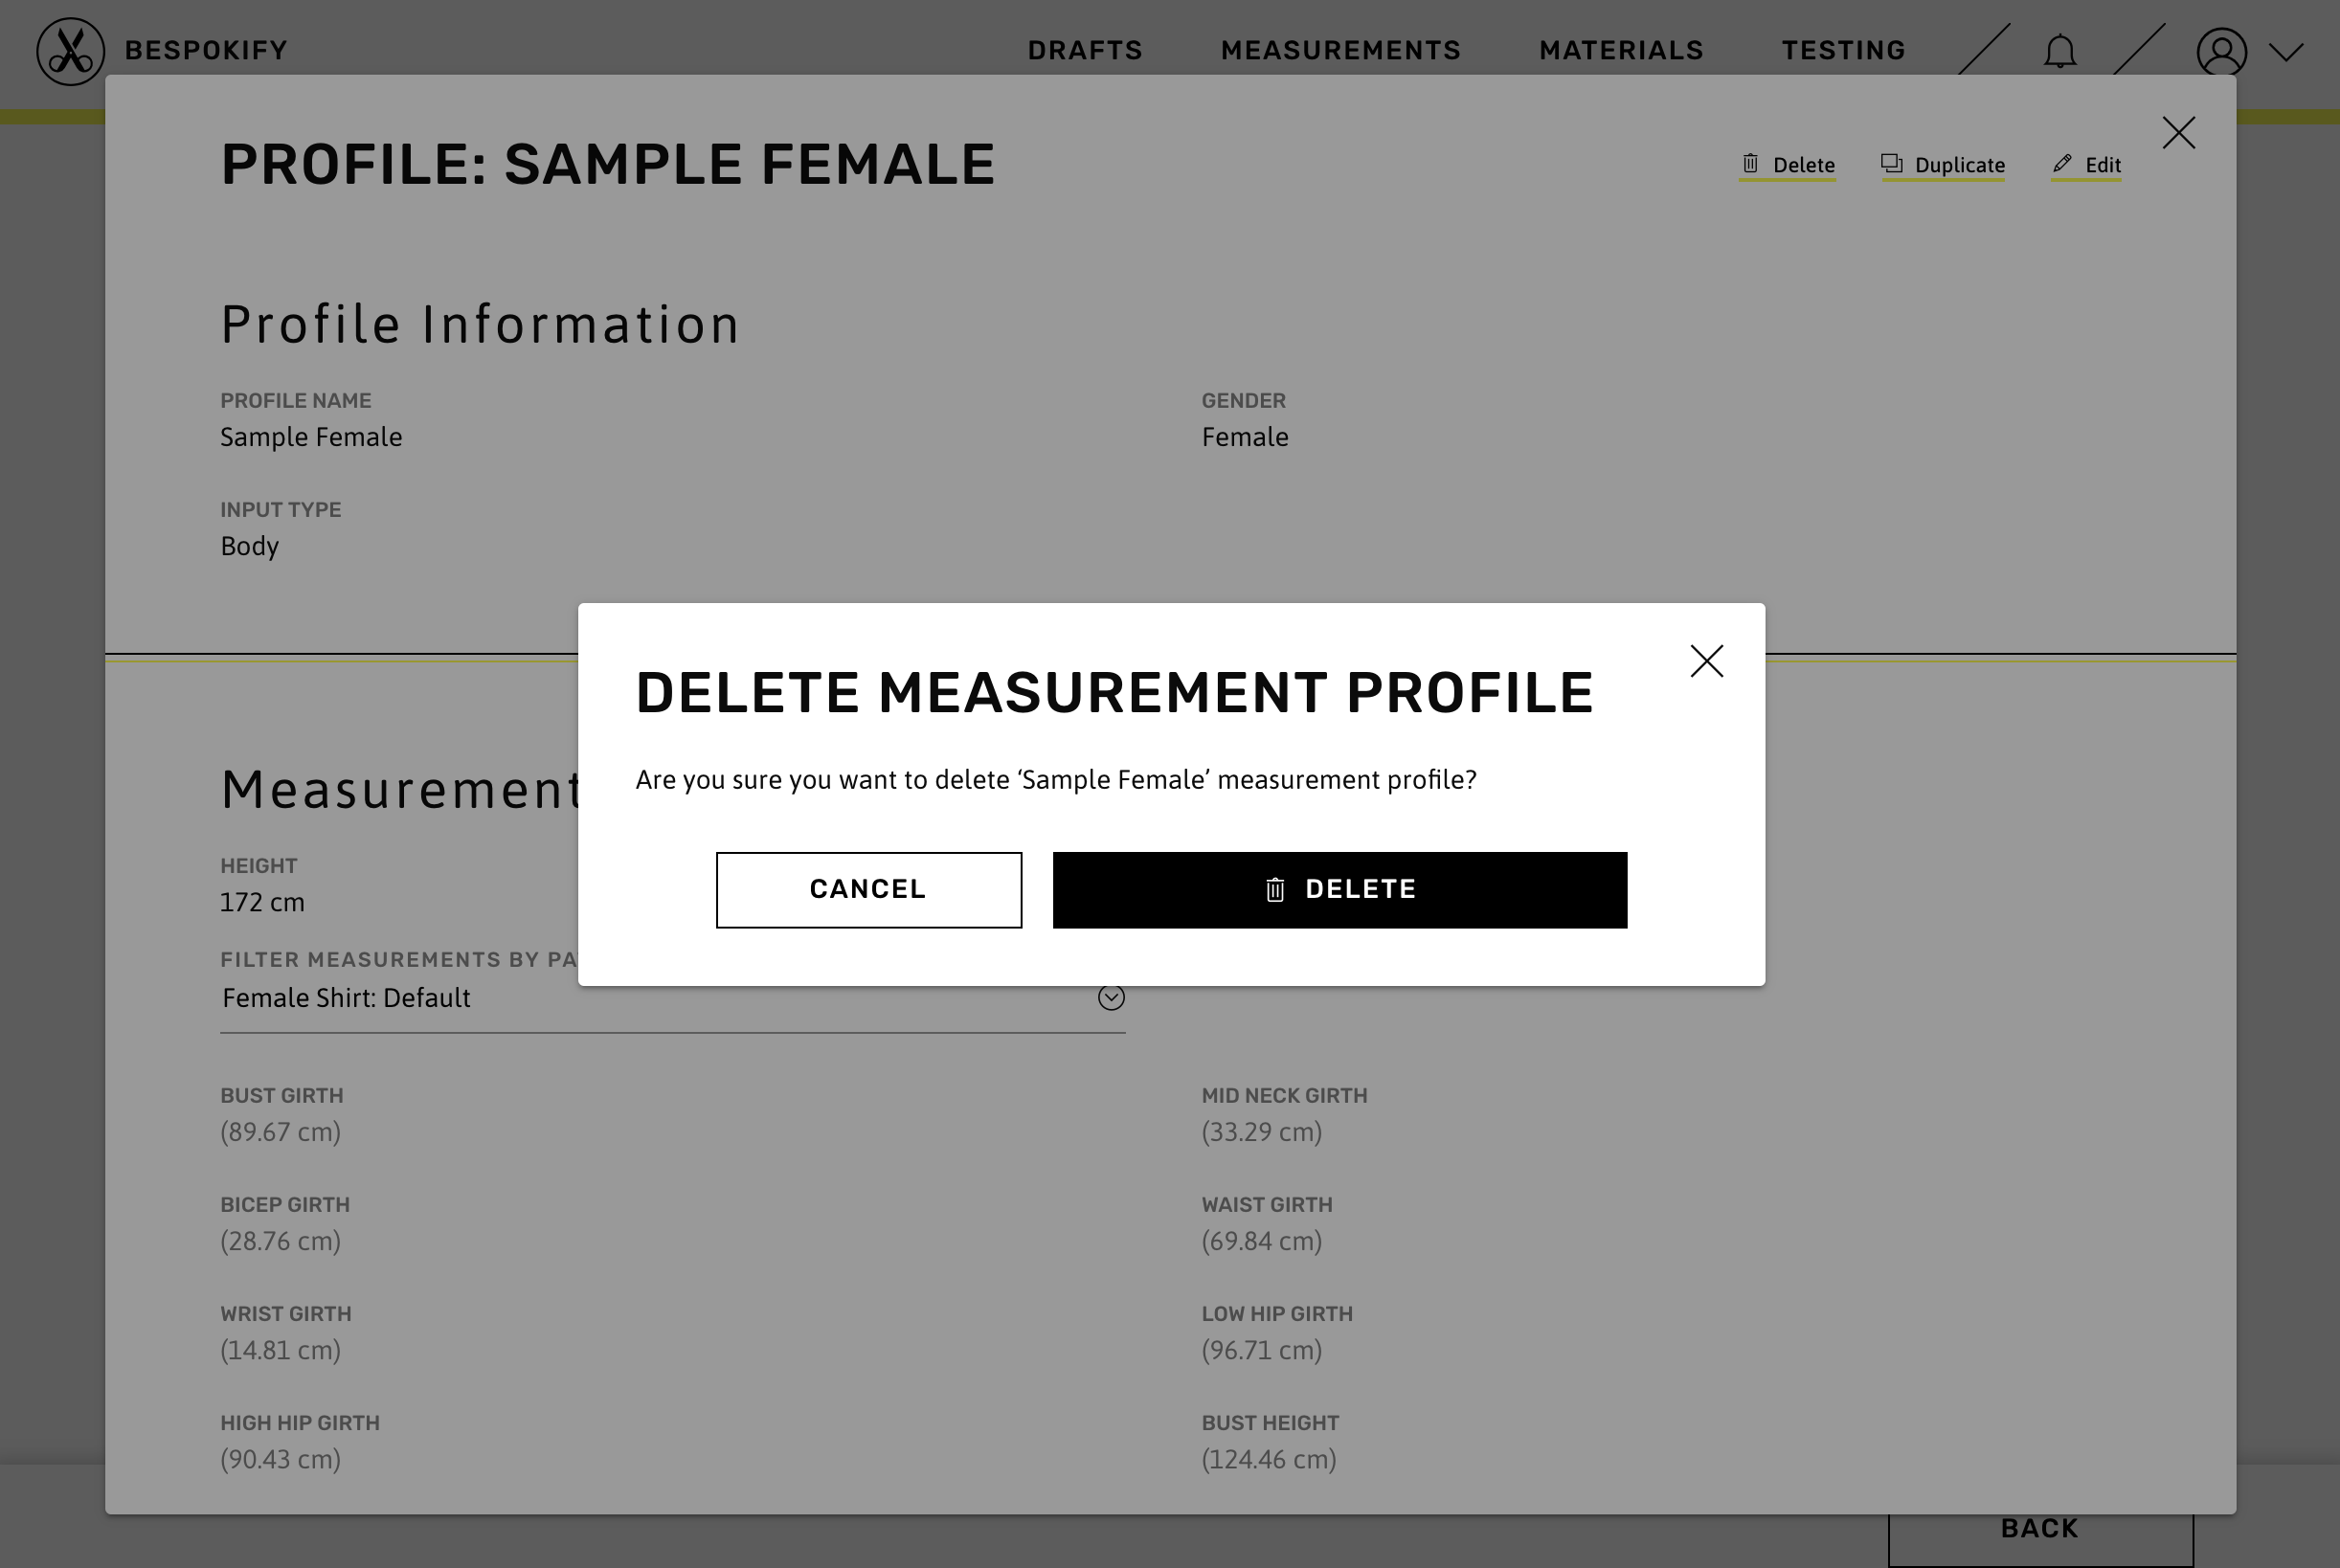
WARNING
Please be aware that when the profile name is clicked on the list view, a popup window will display the Measurement Profile used in that draft. This popup window shows a Delete option that deletes the Measurement Profile, not the draft.
