Measurements
This interface is where users can manage their measurement profiles. These can contain either the list of body measurements for an individual, or lists of specific garment measurements. The measurement profiles are then used in the process of generating drafts to create customer-specific products.
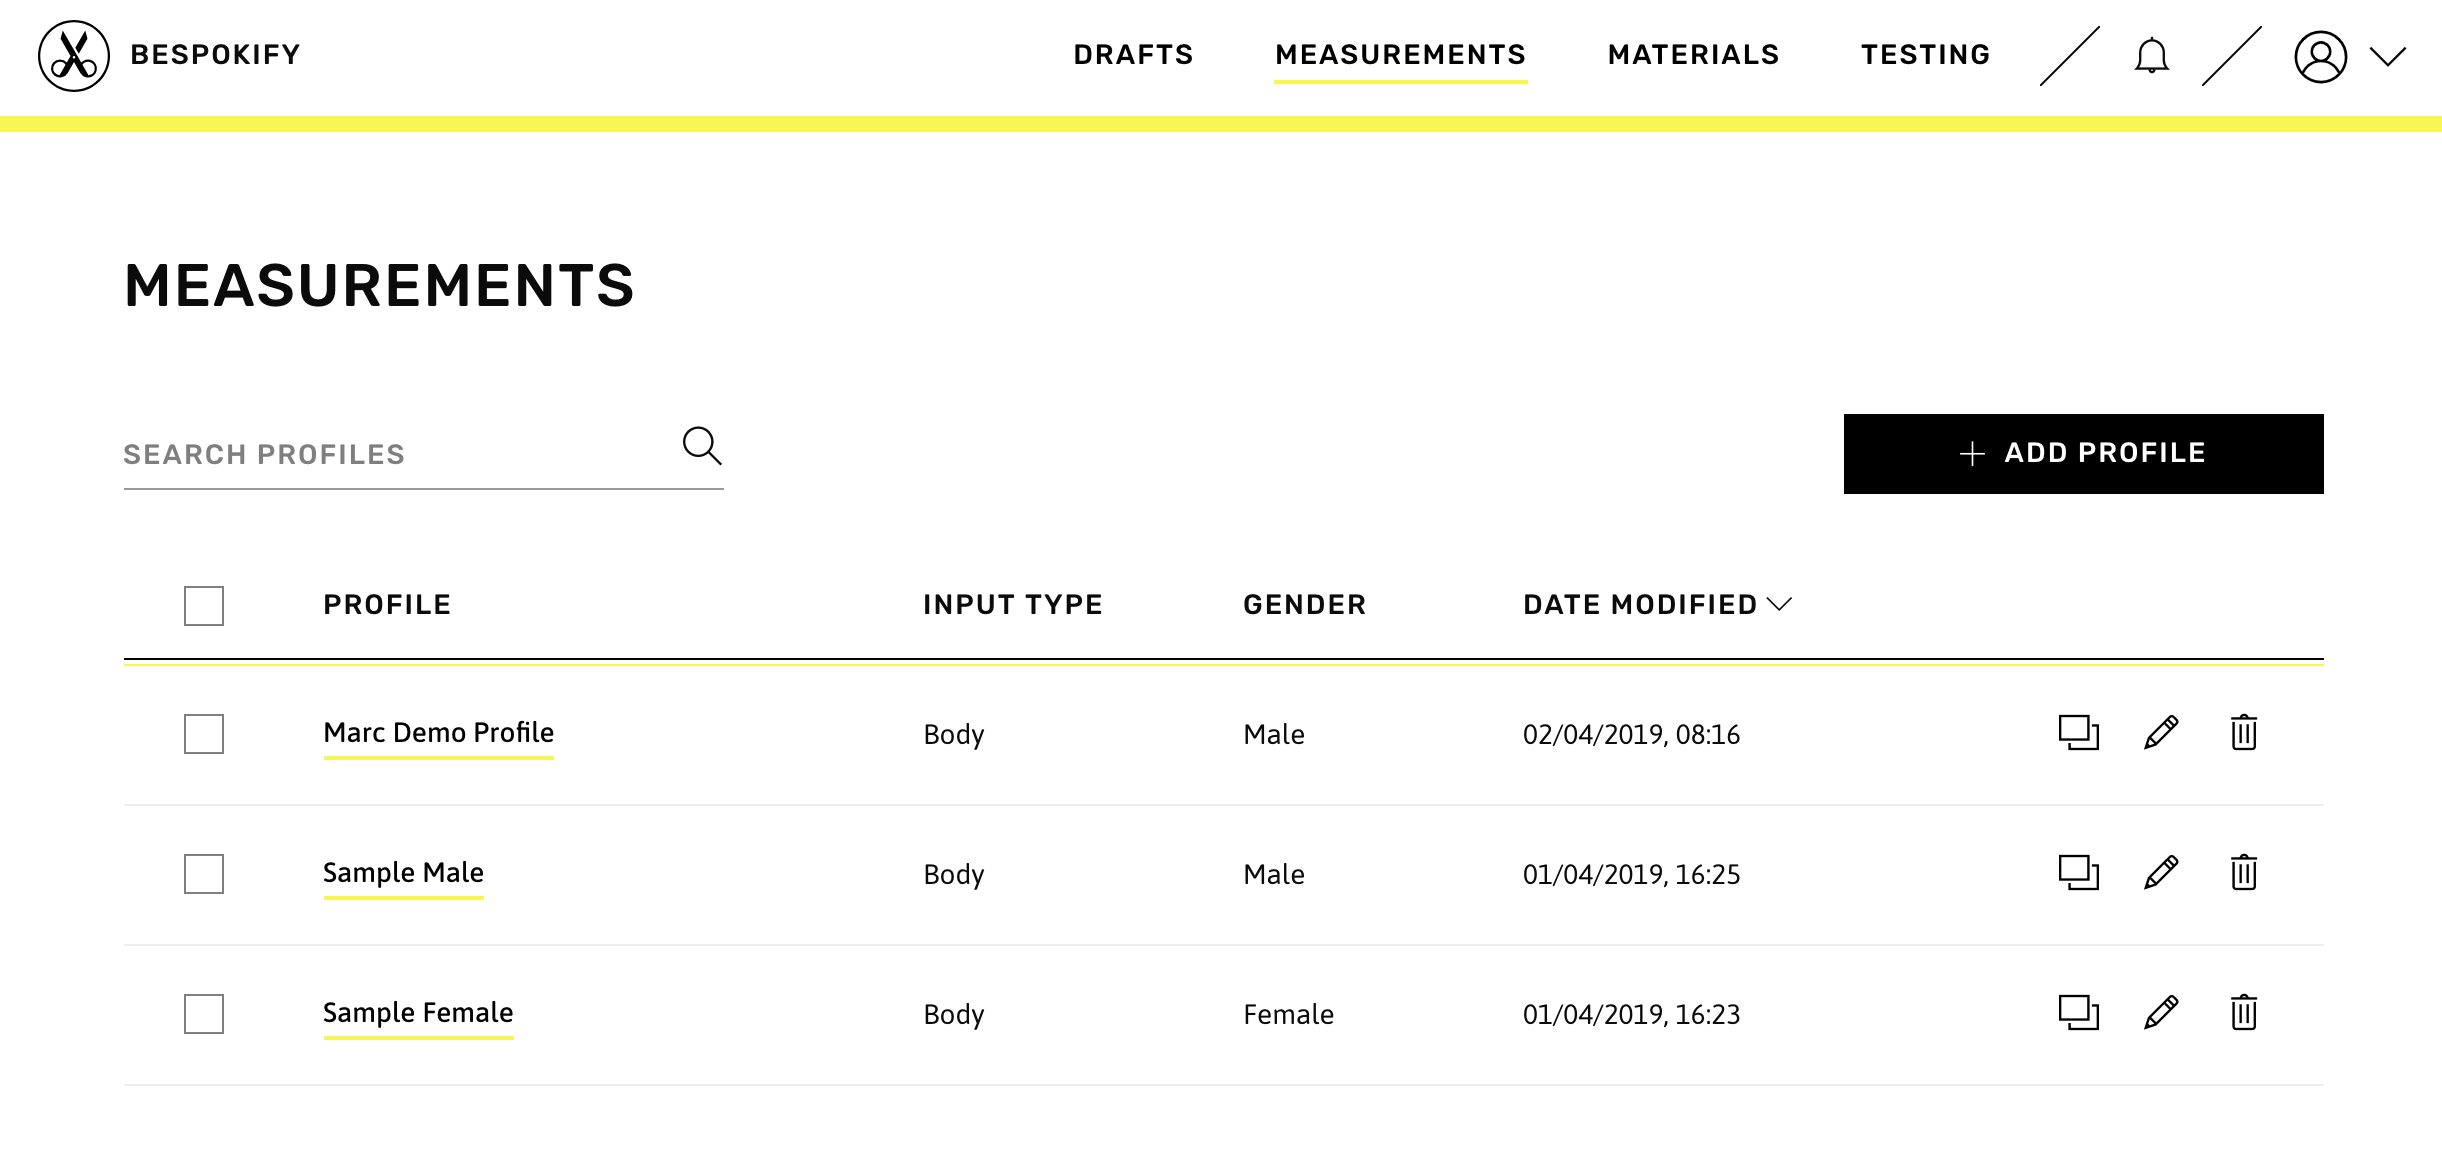
Measurement profiles can be one of two types: Body or Garment. Body measurement profiles contain the list of all possible body measurements for an individual. Garment measurement profiles instead require the user to provide expected measurements for the garment.
From the list view shown above, users have the possibility to search for profiles, add new profiles, view their details, and duplicate, edit, or delete them.
Add a measurement profile
To add a new measurement profile, users must click the Add Profile button from the list view.
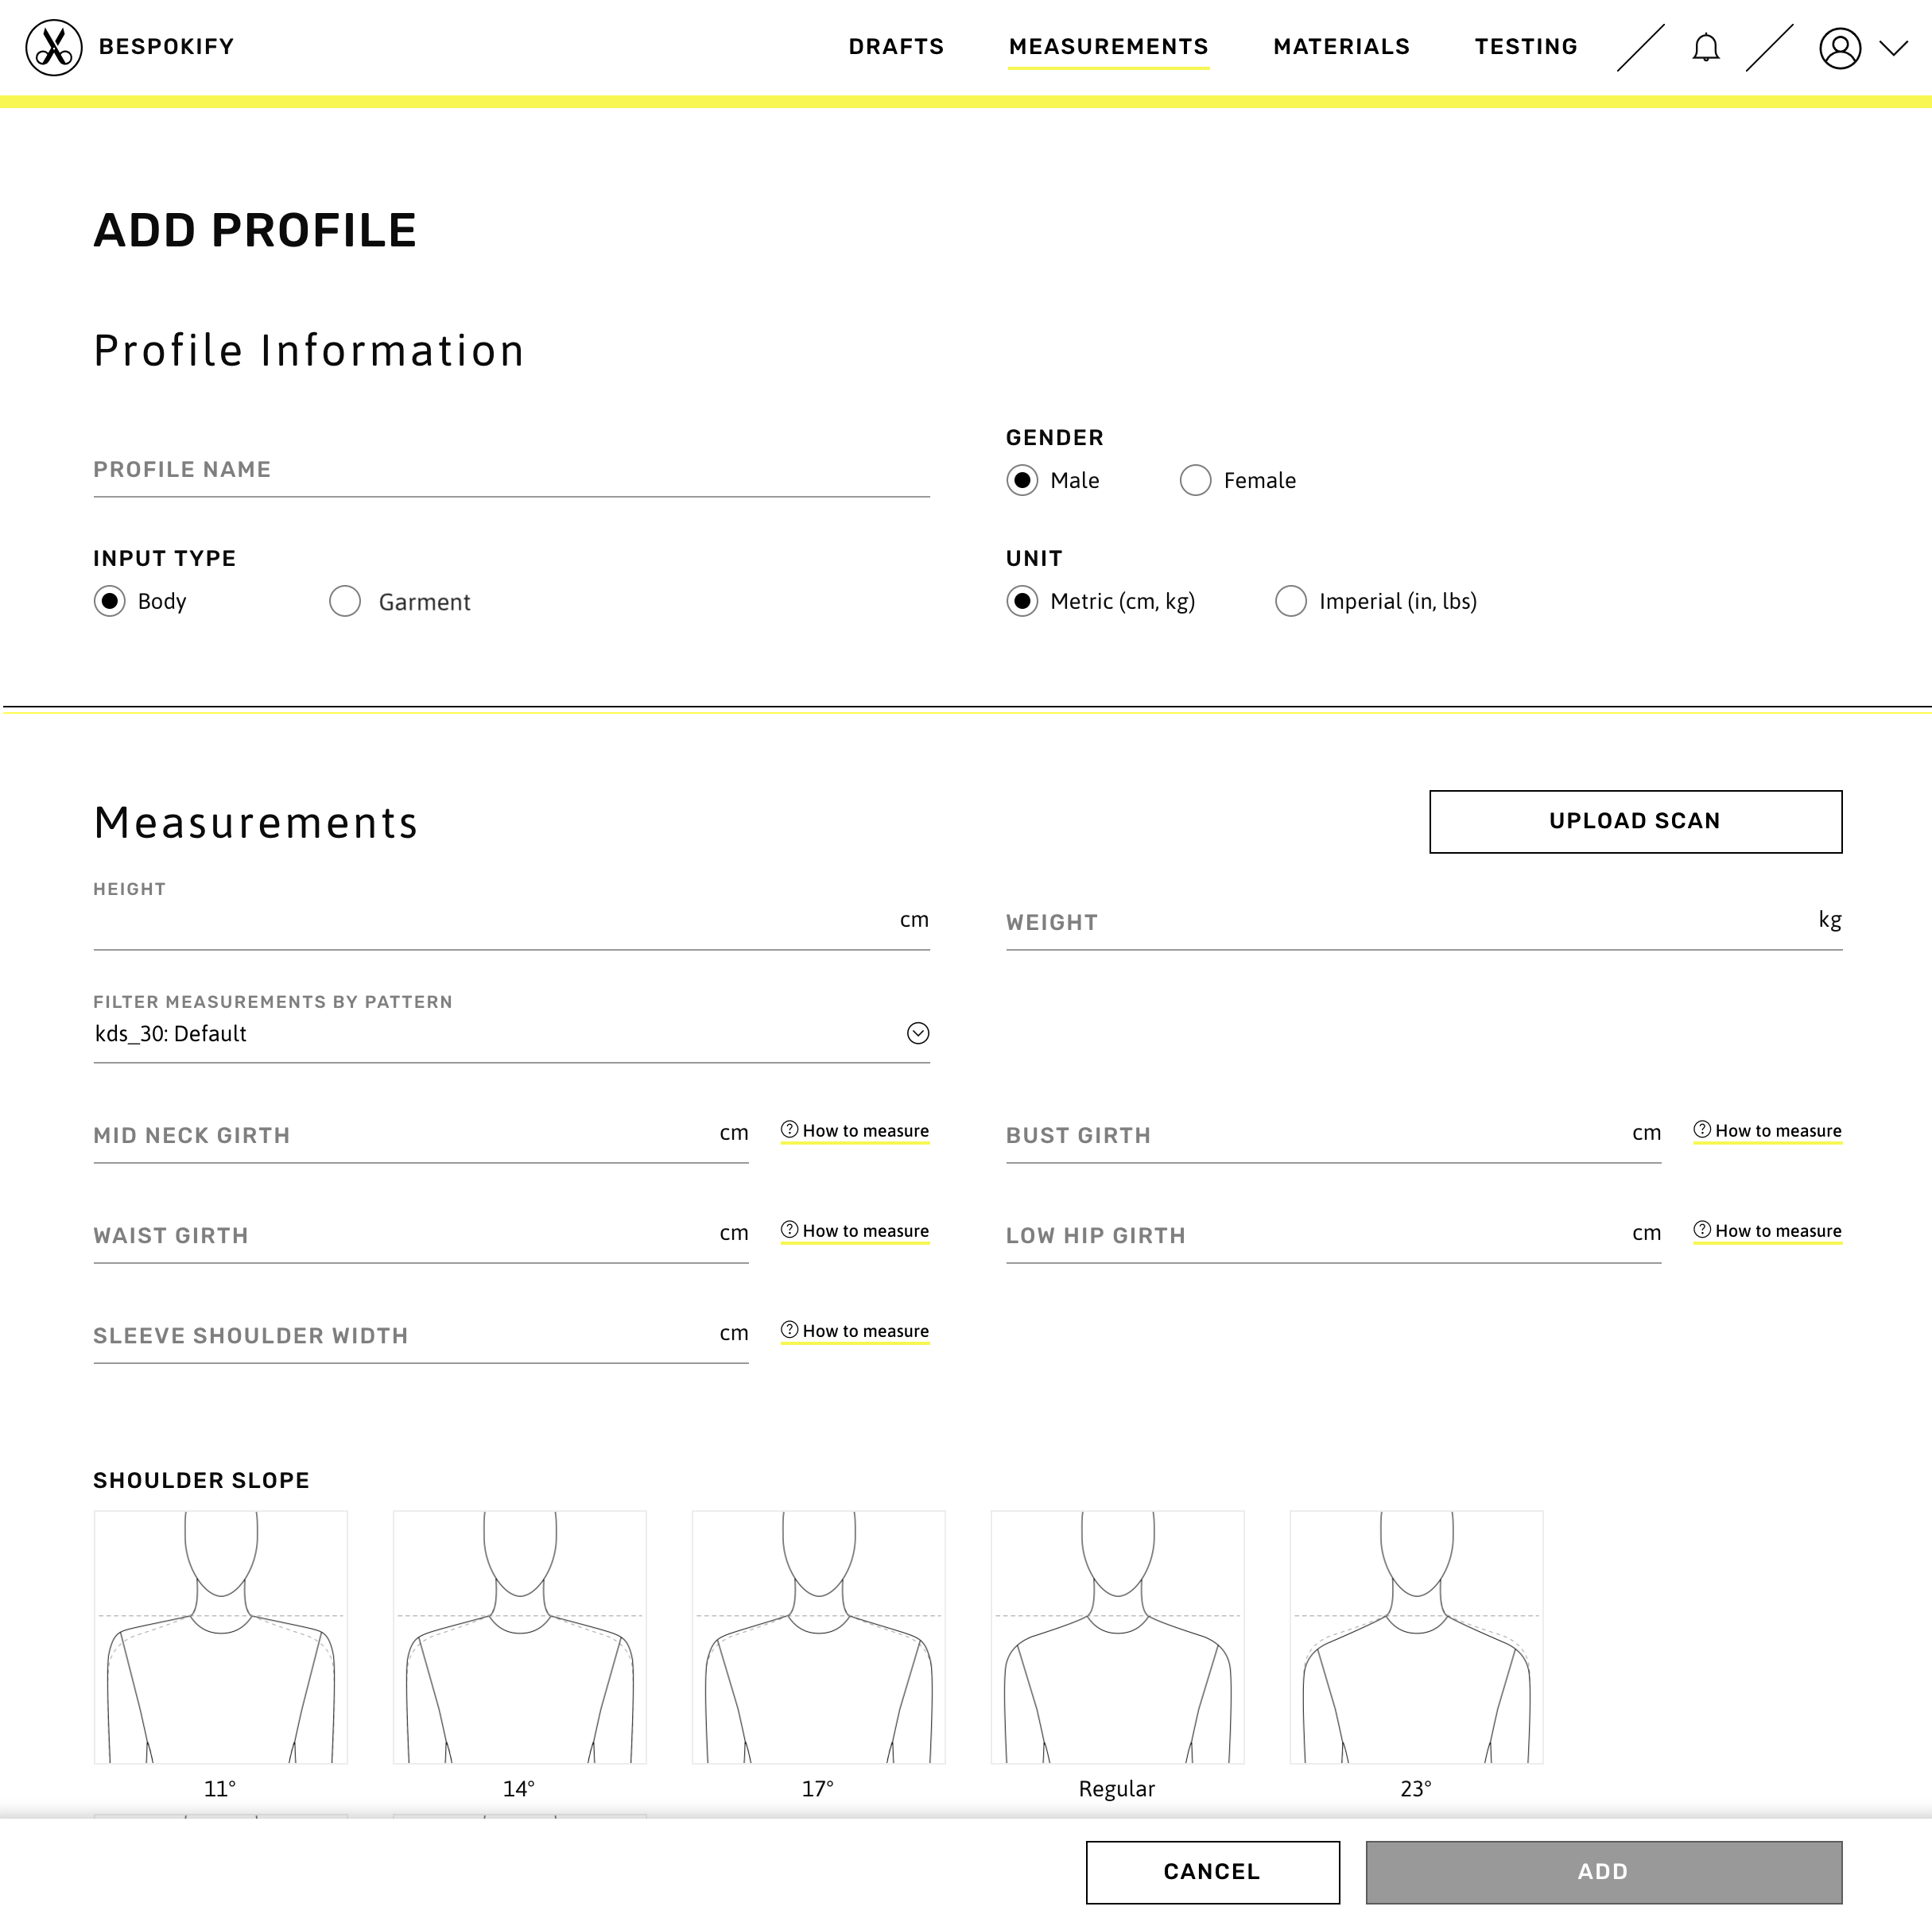
The Add Profile form consists of two sections: Profile Information and Measurements.
1. Profile Information
In this section, the user must specify the profile's Name, Gender, Input Type (Body or Garment), and Unit. The Input Type will affect which fields are displayed in the Measurements section.
2a. Body Measurements
If the Body input type is selected, body measurement fields will appear in the form, including Height and Weight. Additionally, users will have the option to upload a body scan. This quickly populates the body measurement fields.
TIP
By default, all measurement fields will be displayed. Users may filter measurement fields by pattern. Selecting a Pattern Profile as a filter will display only the measurements relevant to that pattern.
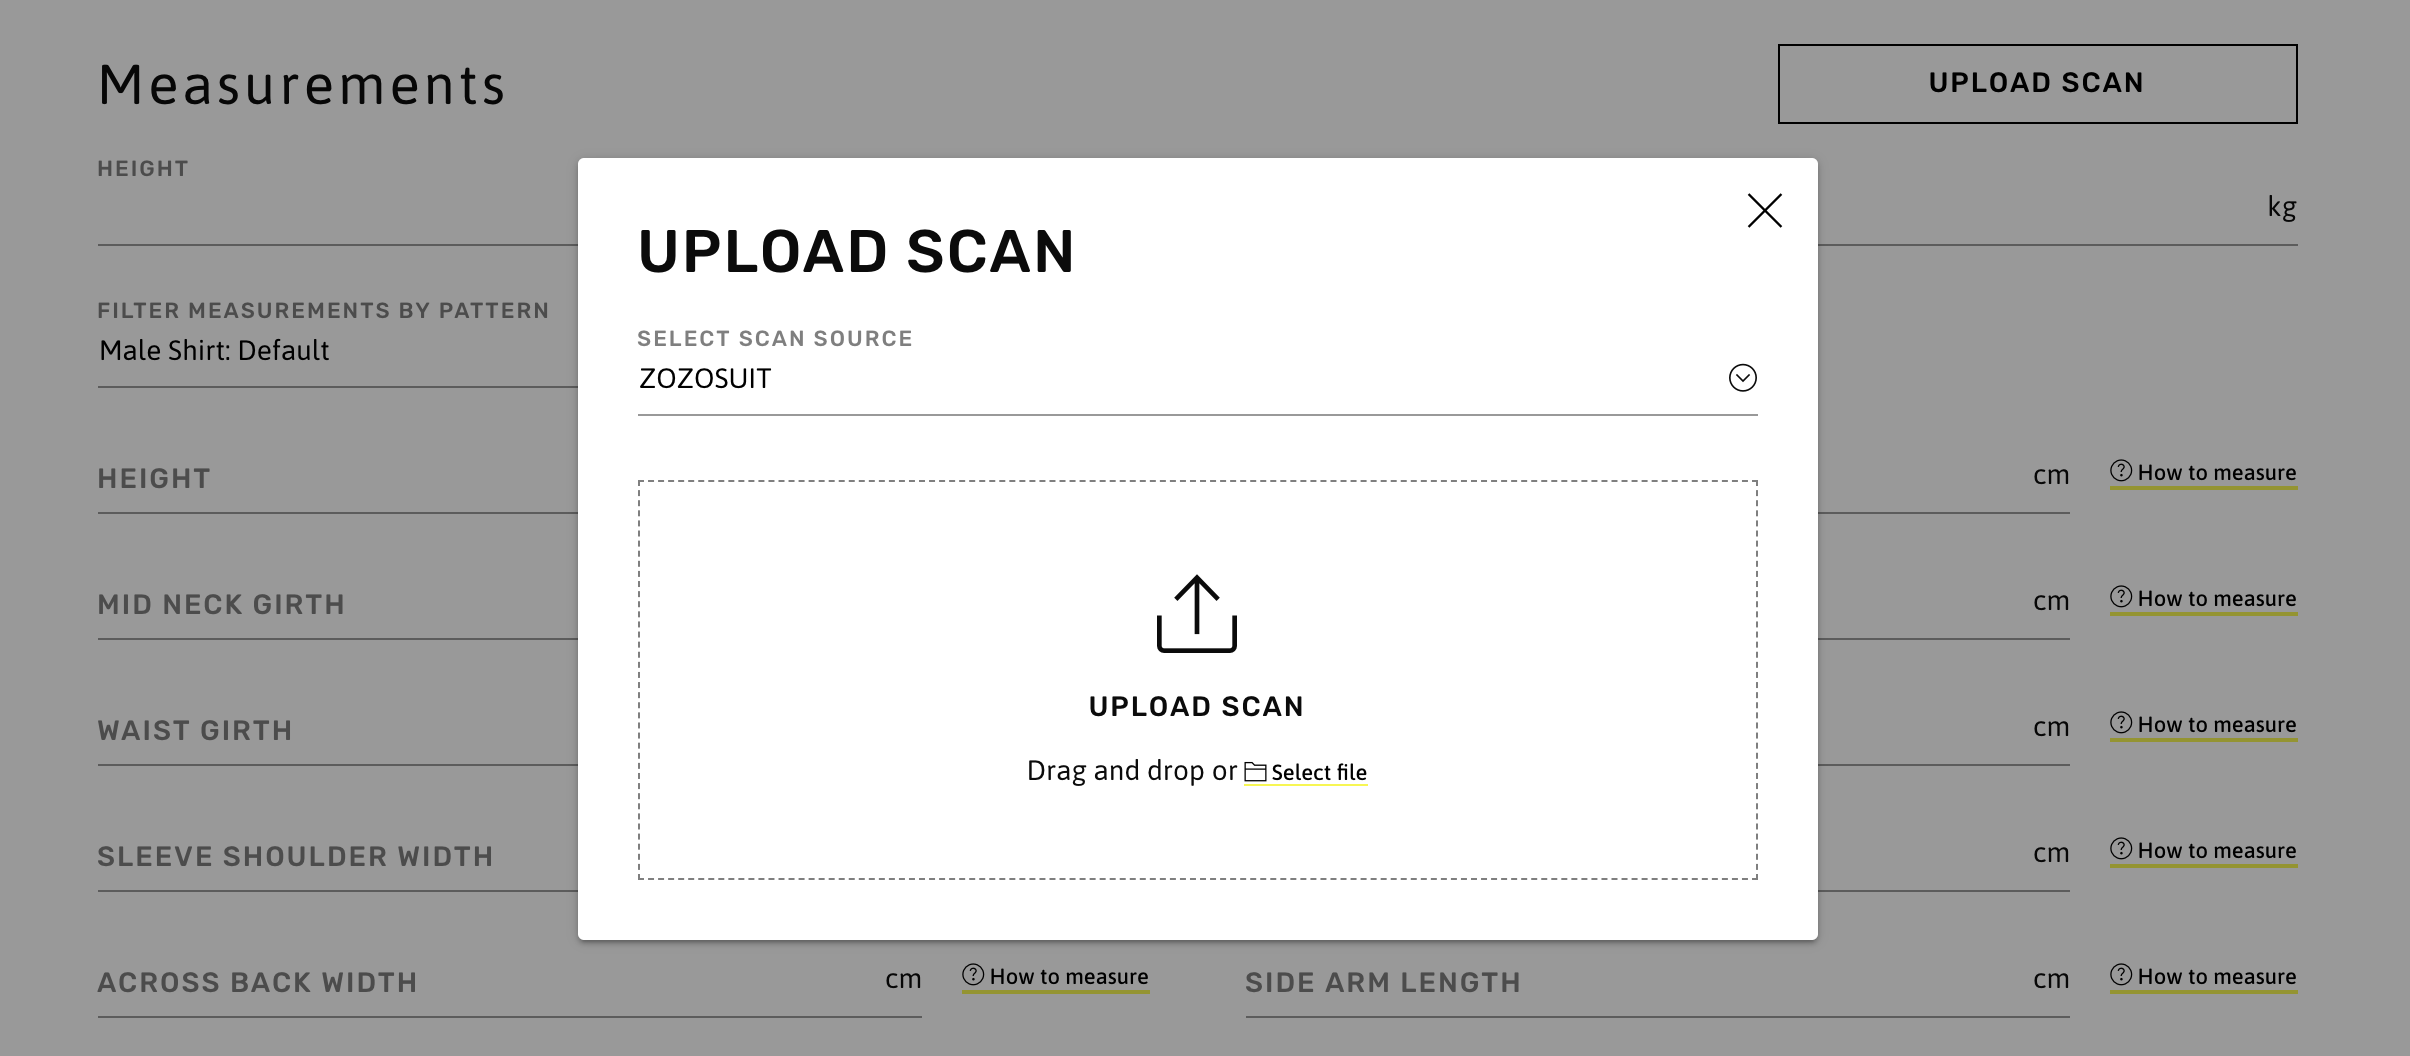
To upload a scan, users must click on the Upload Scan button. From the upload popup, a body scan source must be selected from the list before a file can be selected.
WARNING
Please note that our platform only accepts body scan filetypes that have been validated by us. If you wish to use a body scan filetype that is not in the Scan Source list, please contact us at contact@bespokify.com.
Alternatively, if no body scan file is available, values can be entered manually. After entering values for Height and Weight, the predictor will immediately begin filling the measurement fields. Fields that have a predicted value will be displayed in parentheses.
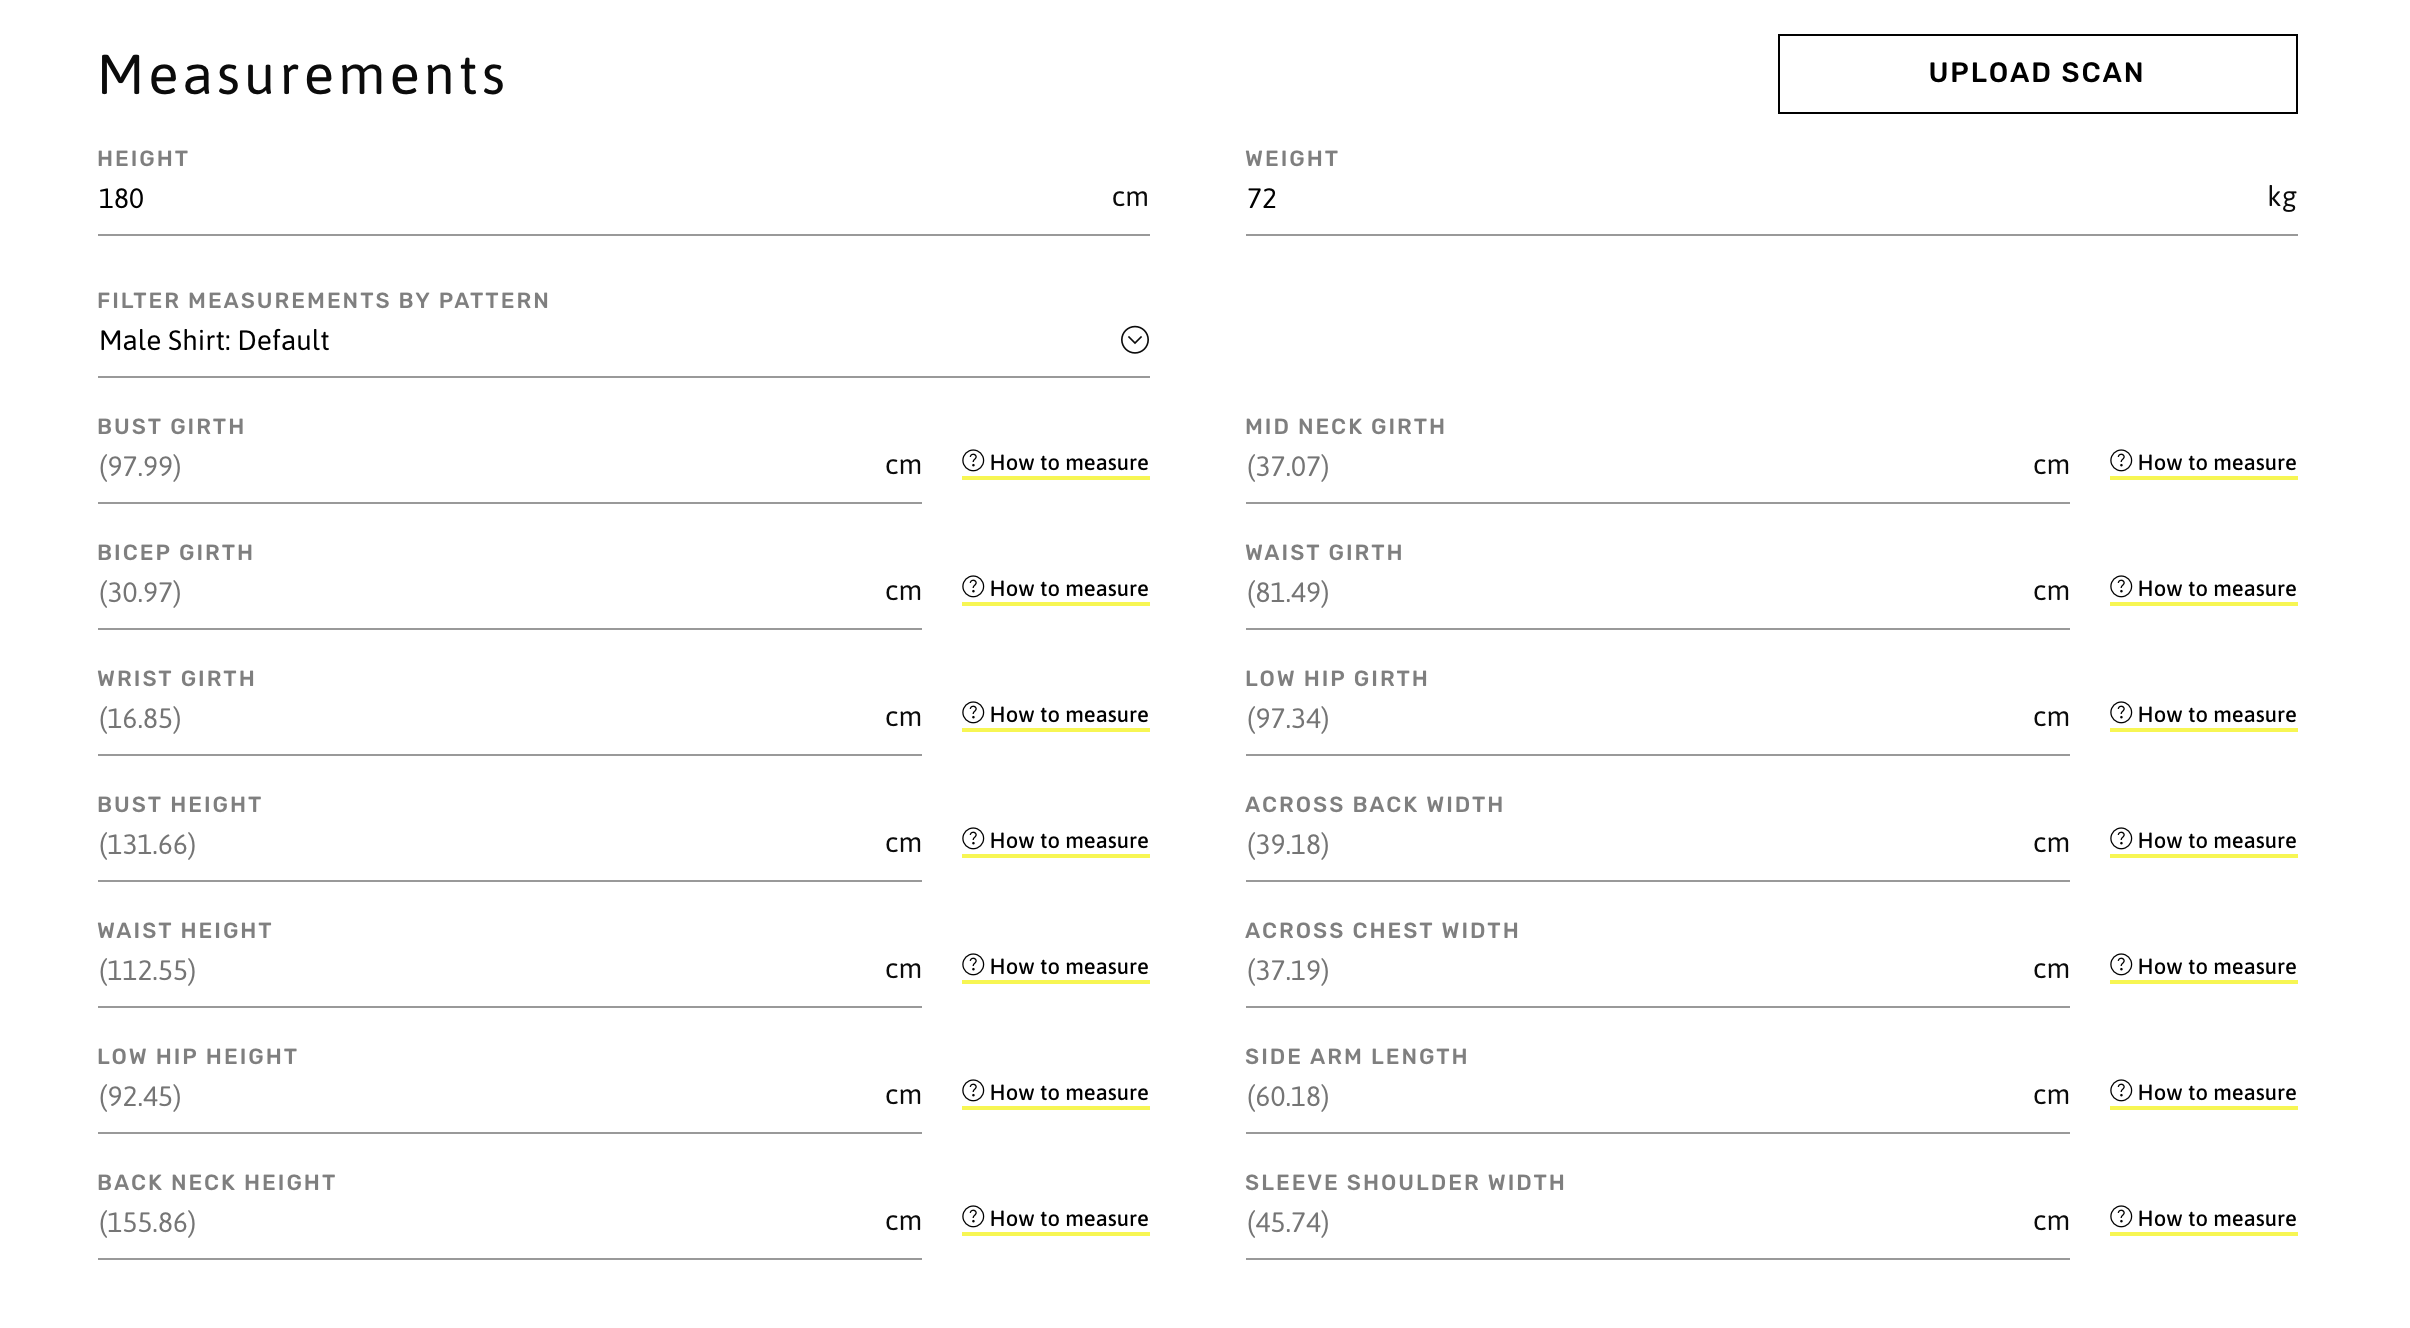
It isn't necessary to enter every single measurement. Body-type profiles leverage the power of our predictor to automatically fill in the fields that are left blank, based on the person's height and weight. As more measurements are entered by the user, the remaining fields are updated with increasingly accurate predicted values.
As mentioned in the Tip, the measurement fields shown on screen will be filtered by the selected pattern. To view additional sets of body measurements for the same profile, a different pattern must be chosen as a filter. In the previous example, only measurements relevant to the Male Shirt are displayed. If Male Trouser is selected, a different set of measurements and body shapes will be shown:
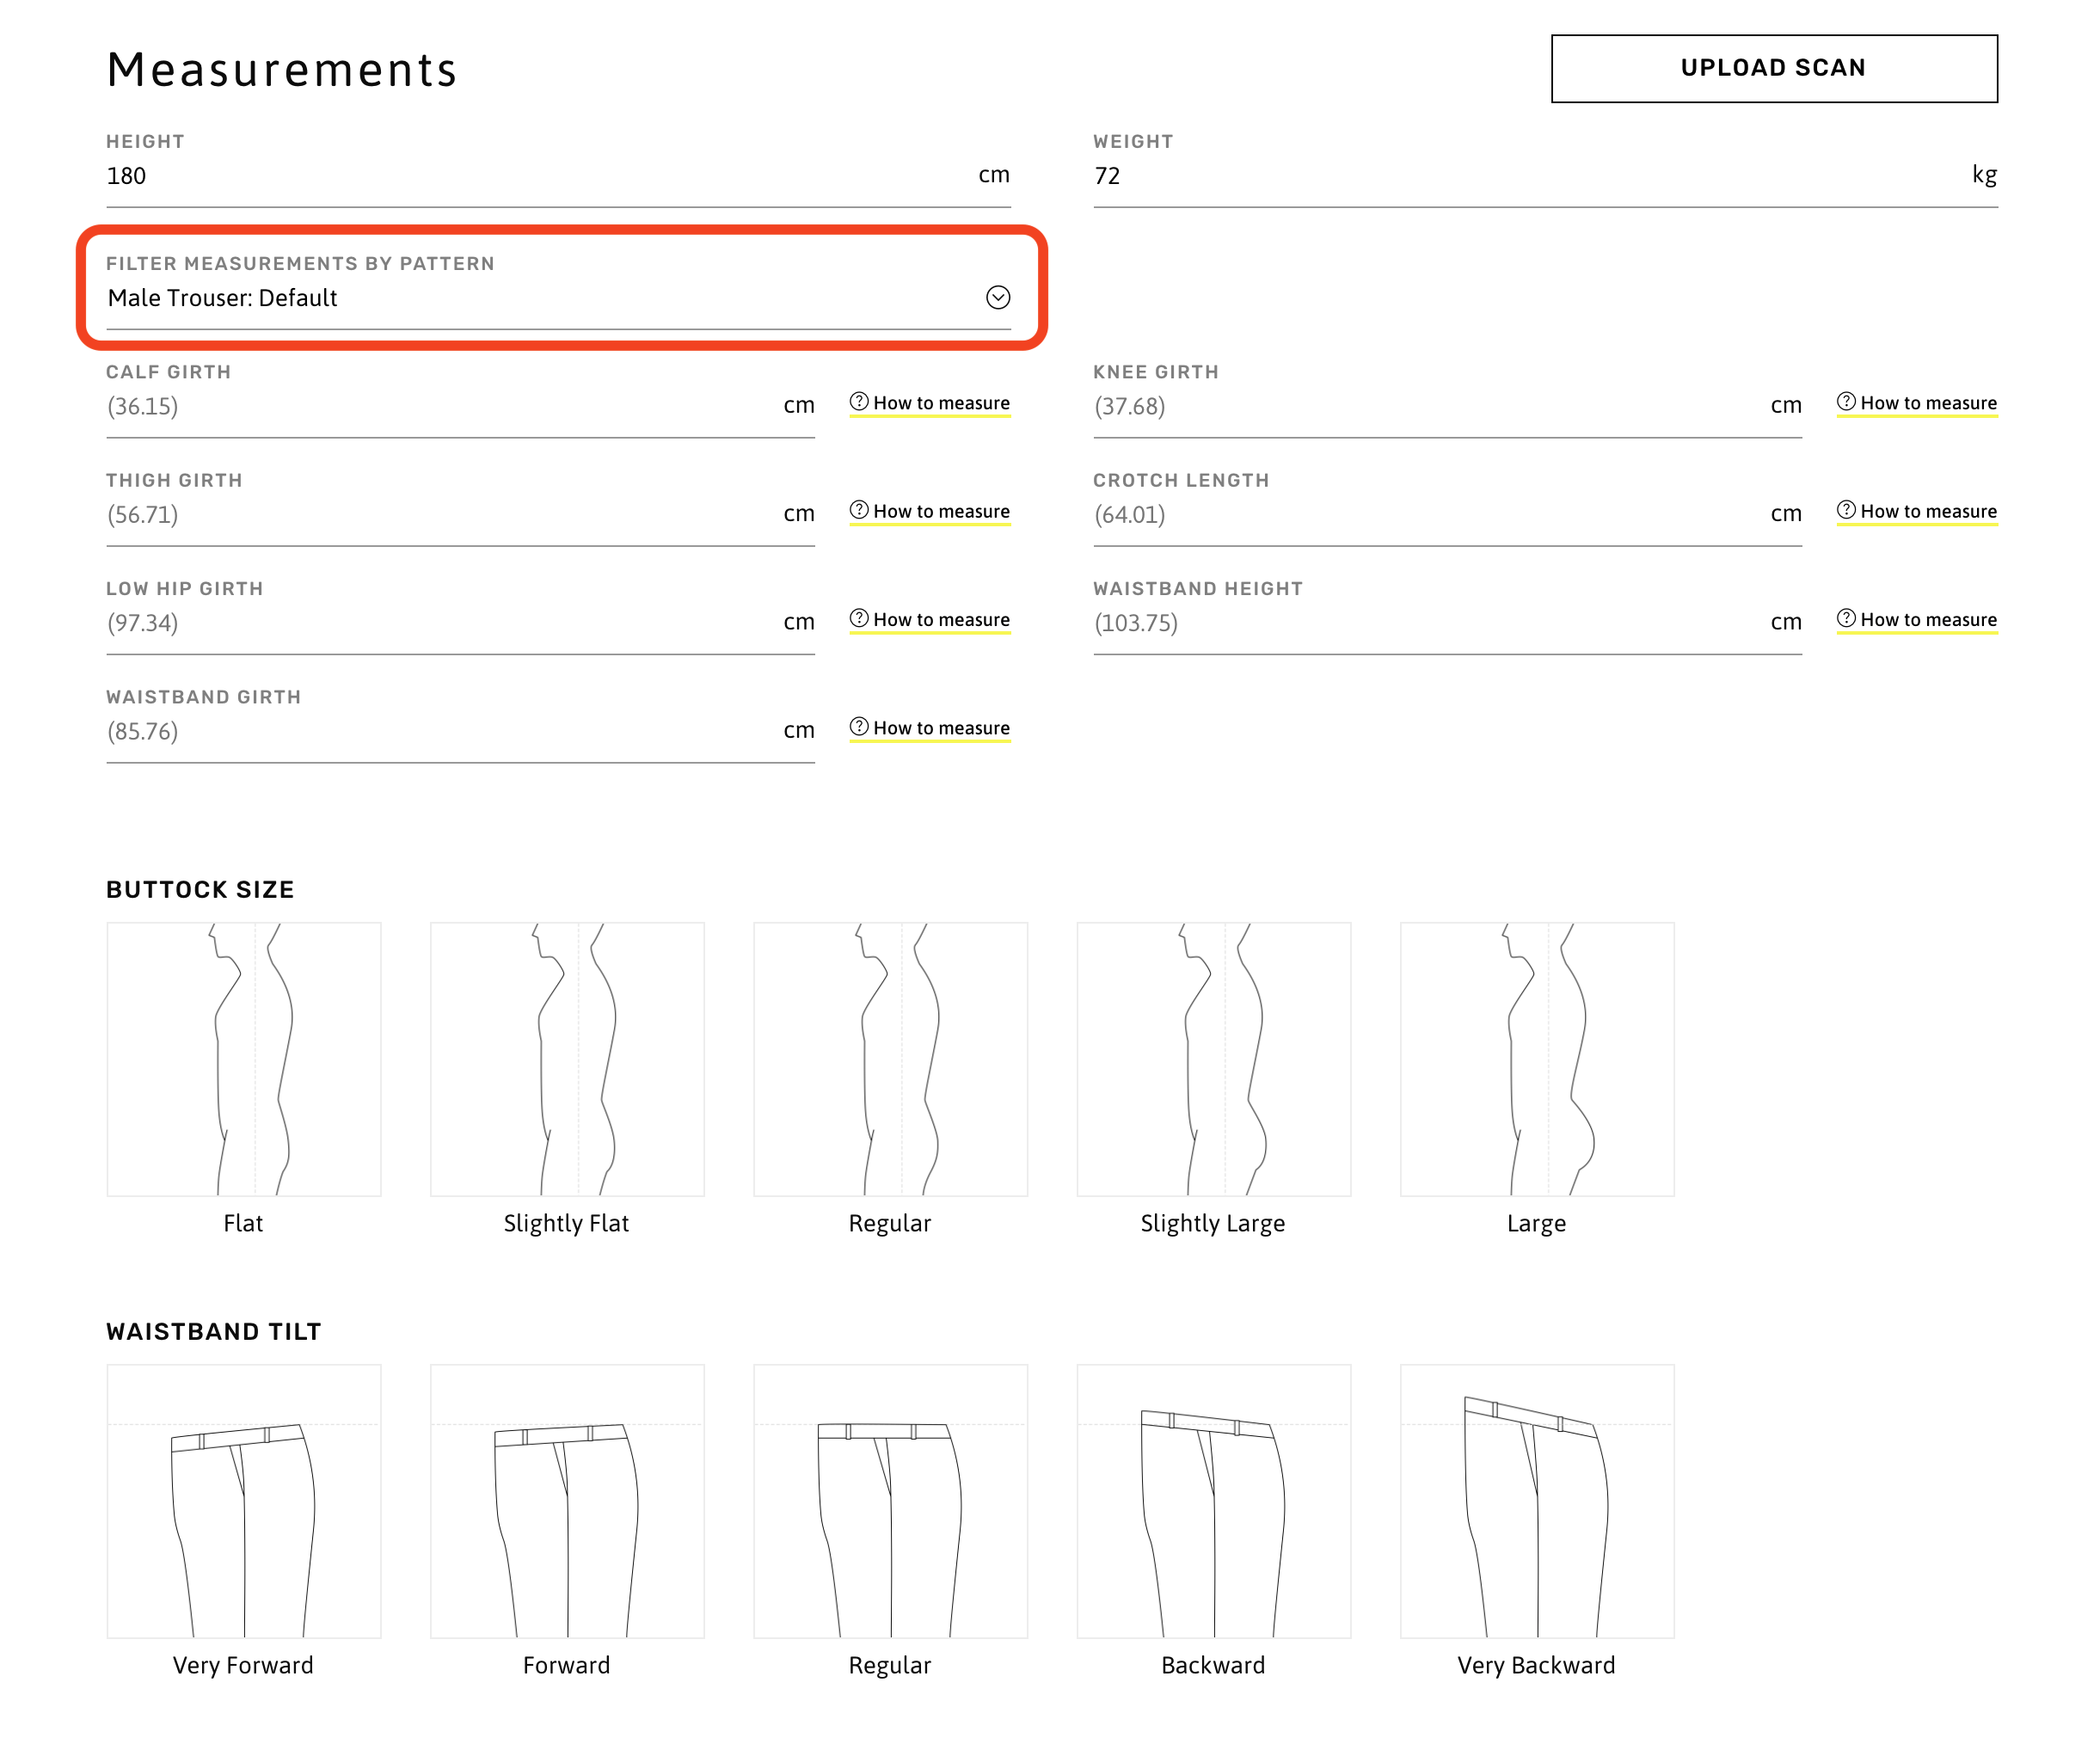
The last step of defining a Body measurement profile is selecting body shapes. Once that's done, an optional note can be entered for the profile before it is saved.
2b. Garment Measurements
If the Garment input type is selected, the user will have to enter garment measurement values for the selected pattern filter. These measurements may be body measurements with an additional ease (e.g. Bust Girth with Ease) or measurements for specific garment pieces (e.g. Sleeve shoulder width).
In the following example, the same Male Shirt pattern is used as a filter but since the Garment type is selected, the measurement fields are different. There are no fields for Height and Weight, nor is there an option to upload a body scan. Additionally, be aware that Garment measurements do not make use of a predictive system. All values must be provided by the user.
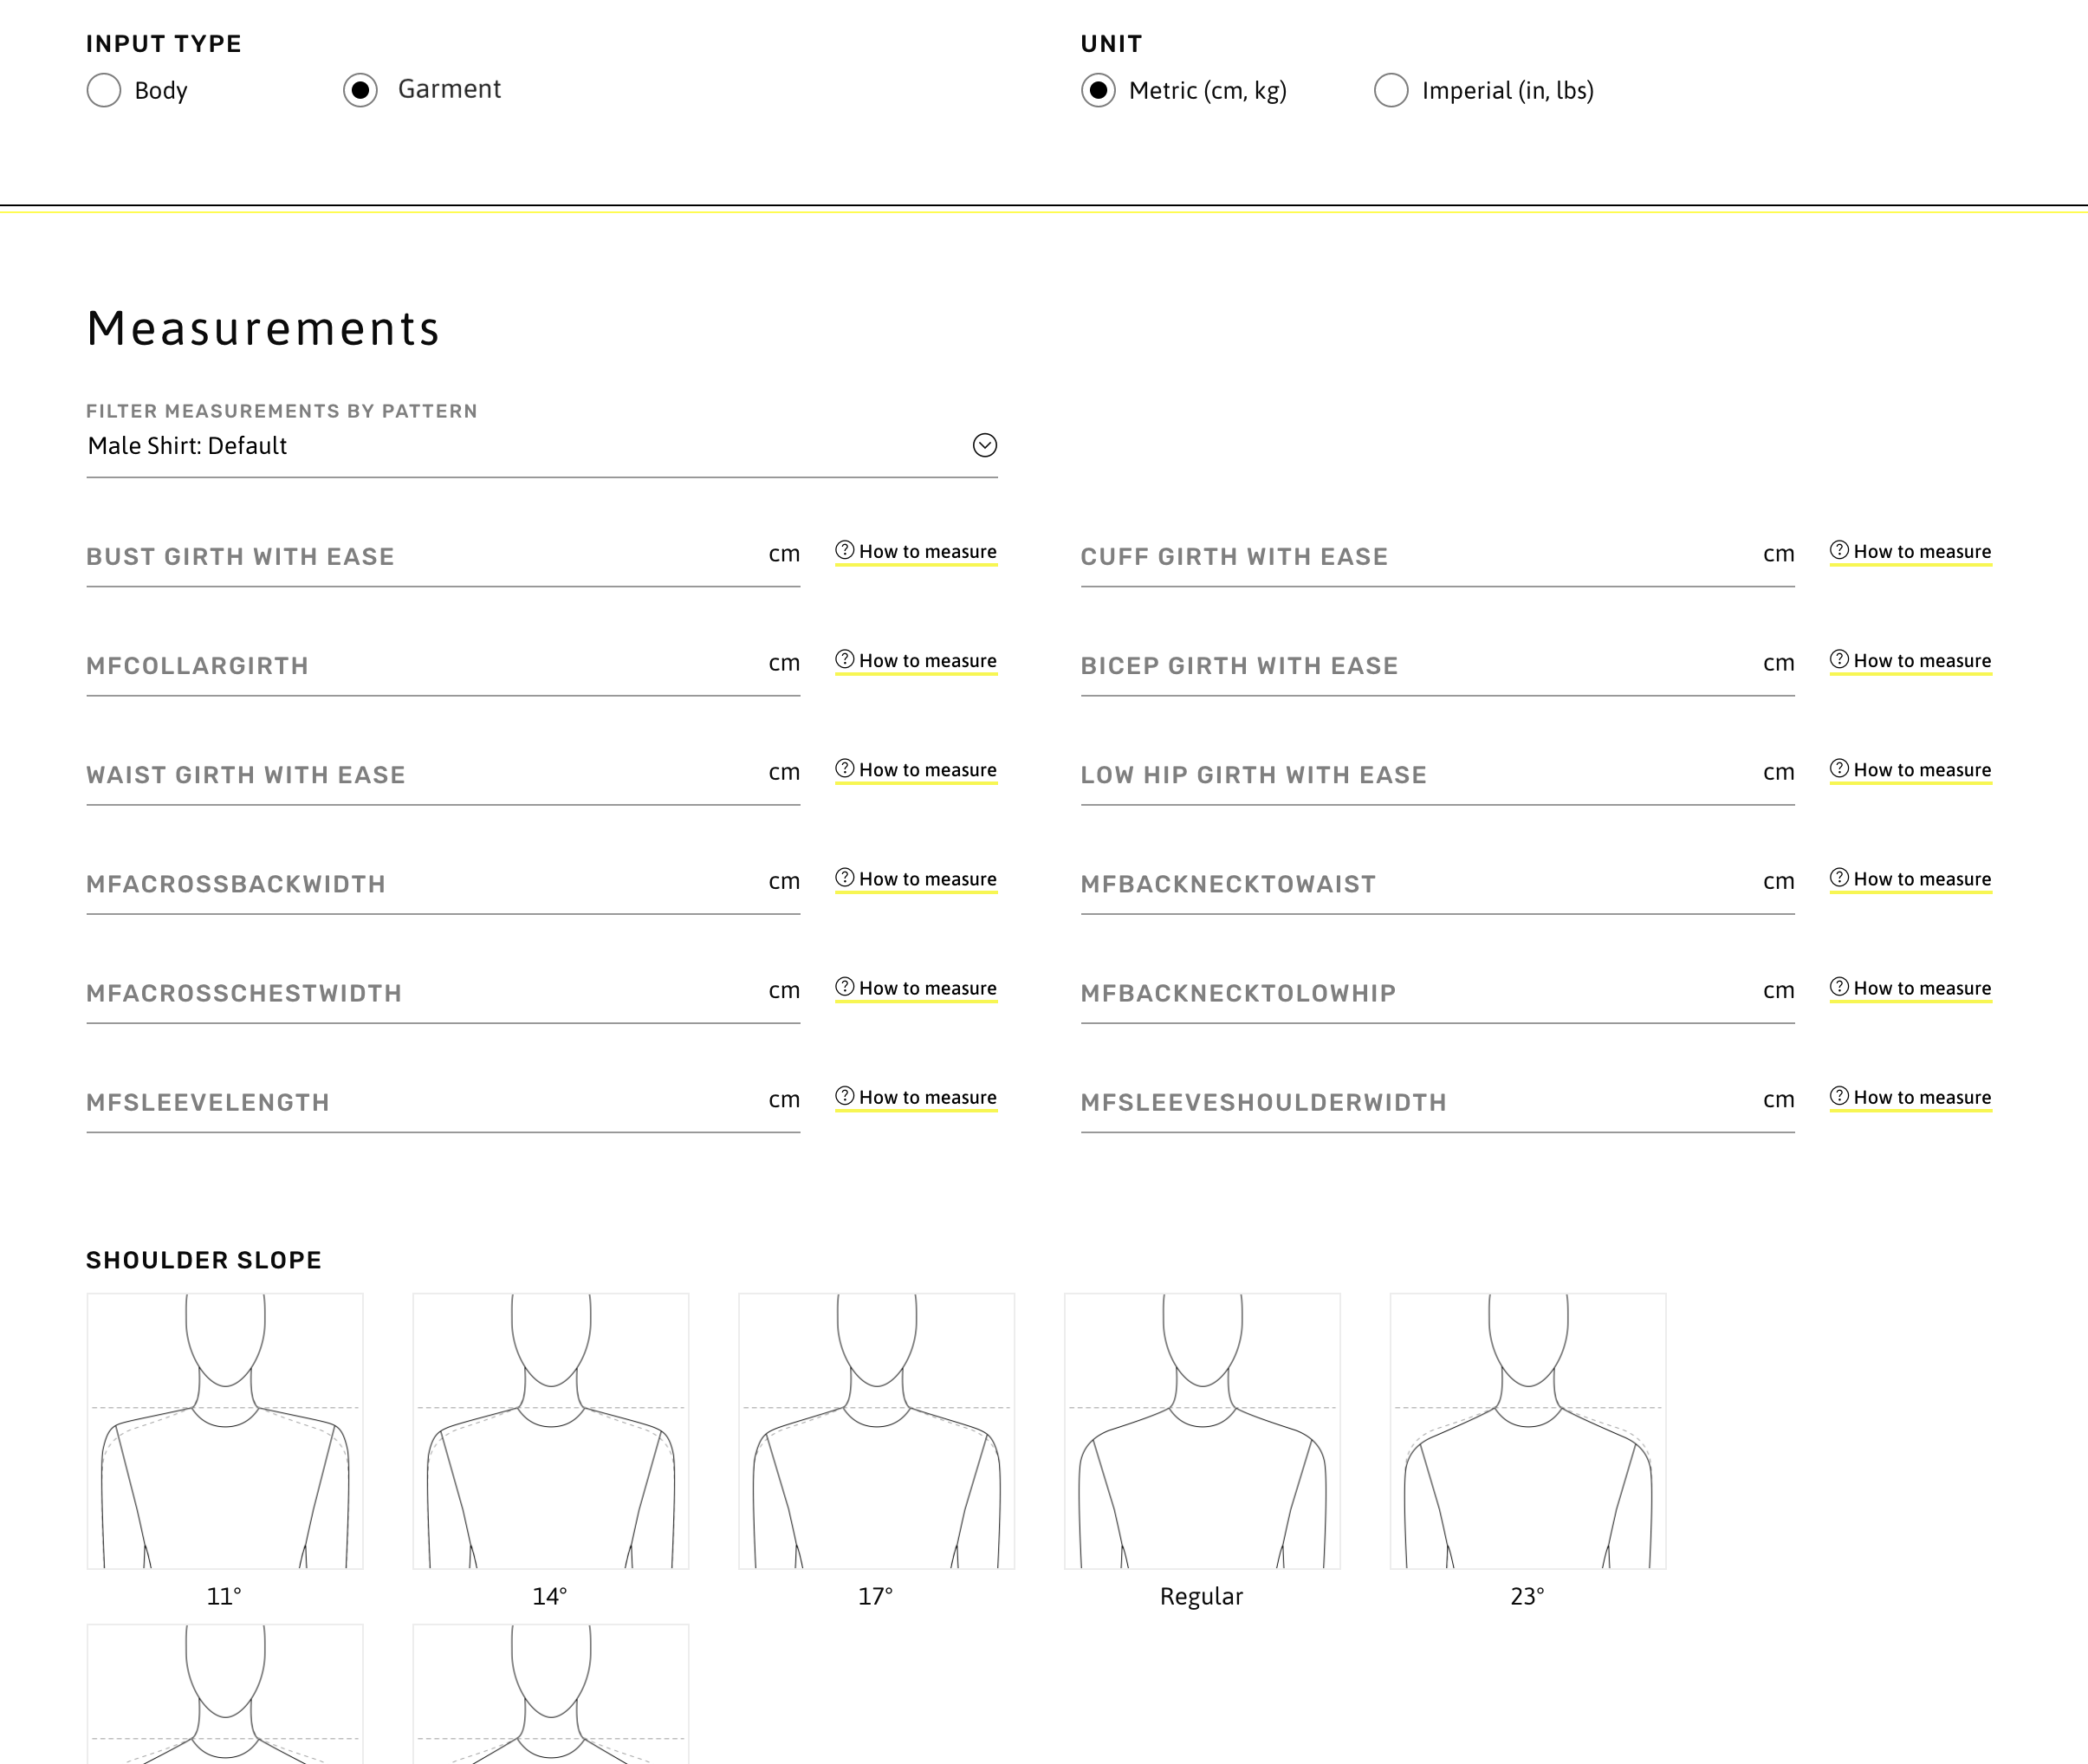
After the body shape options are selected and the profile is saved, a confirmation message will appear at the top of the screen.
Edit a measurement profile
To edit a profile, users can click on the pencil icon from the Measurements list:

or in the top-right corner of the profile details:

Users can then proceed to update the fields for the measurement profile using the same form as the one used to create a new profile. When the profile is saved, a confirmation message will appear at the top of the screen.
Delete a measurement profile
Similarly to editing a measurement profile, users can click on the bin icon in the Measurements list, or in the top-right corner of the profile details. A confirmation popup will be displayed.
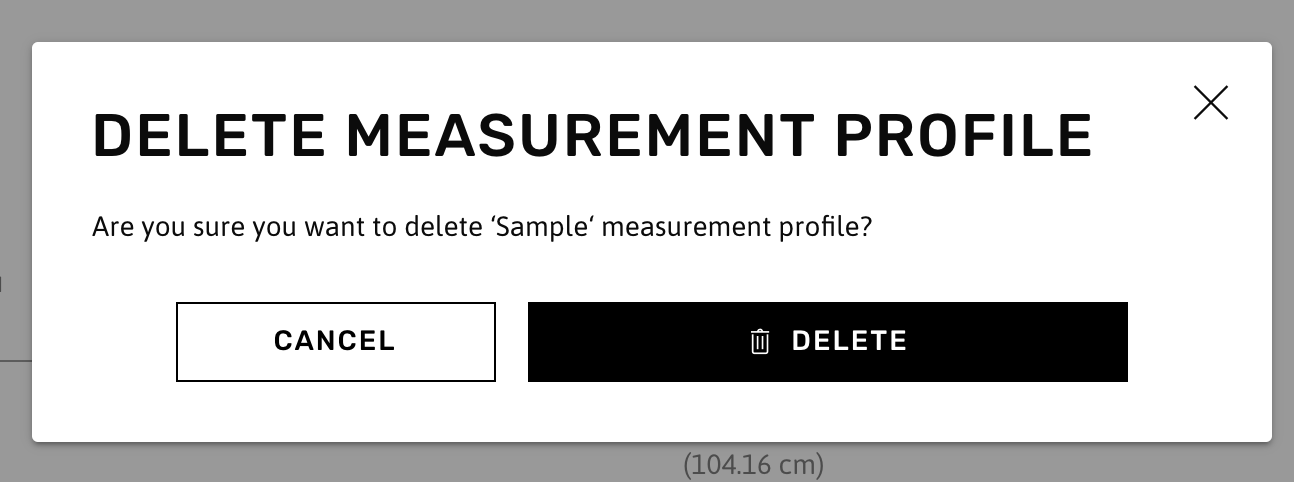
A confirmation message will appear at the top of the screen confirming that the profile was deleted.